1,000+ IT leaders have weighed in. See what they are saying about AI agents in the 2026 Connectivity Benchmark Report.
Learn more.Getting started with Runtime Fabric on Azure Kubernetes Service (AKS)

This cookbook will walk you through the process of installing Anypoint Runtime Fabric (RTF) on Azure Kubernetes Service (AKS). You will create an Azure Kubernetes Cluster and install RTF. Once completed you will deploy a sample MuleSoft application to verify everything is working.
Please note that this tutorial only applies to Runtime Fabric version 1.9.
If this is your first time using MuleSoft, click the signup button below to get started.
Already have an account? Sign in.
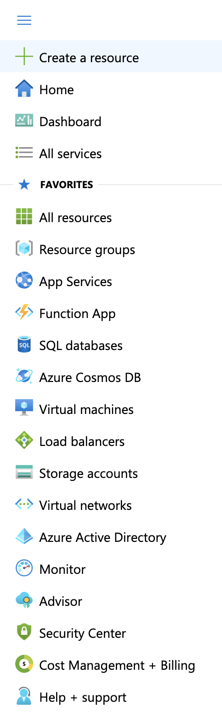
From any browser, go to the URL to access Microsoft Azure Portal: https://portal.azure.com/. Click on the upper left navigation bar. Select Create a resource.
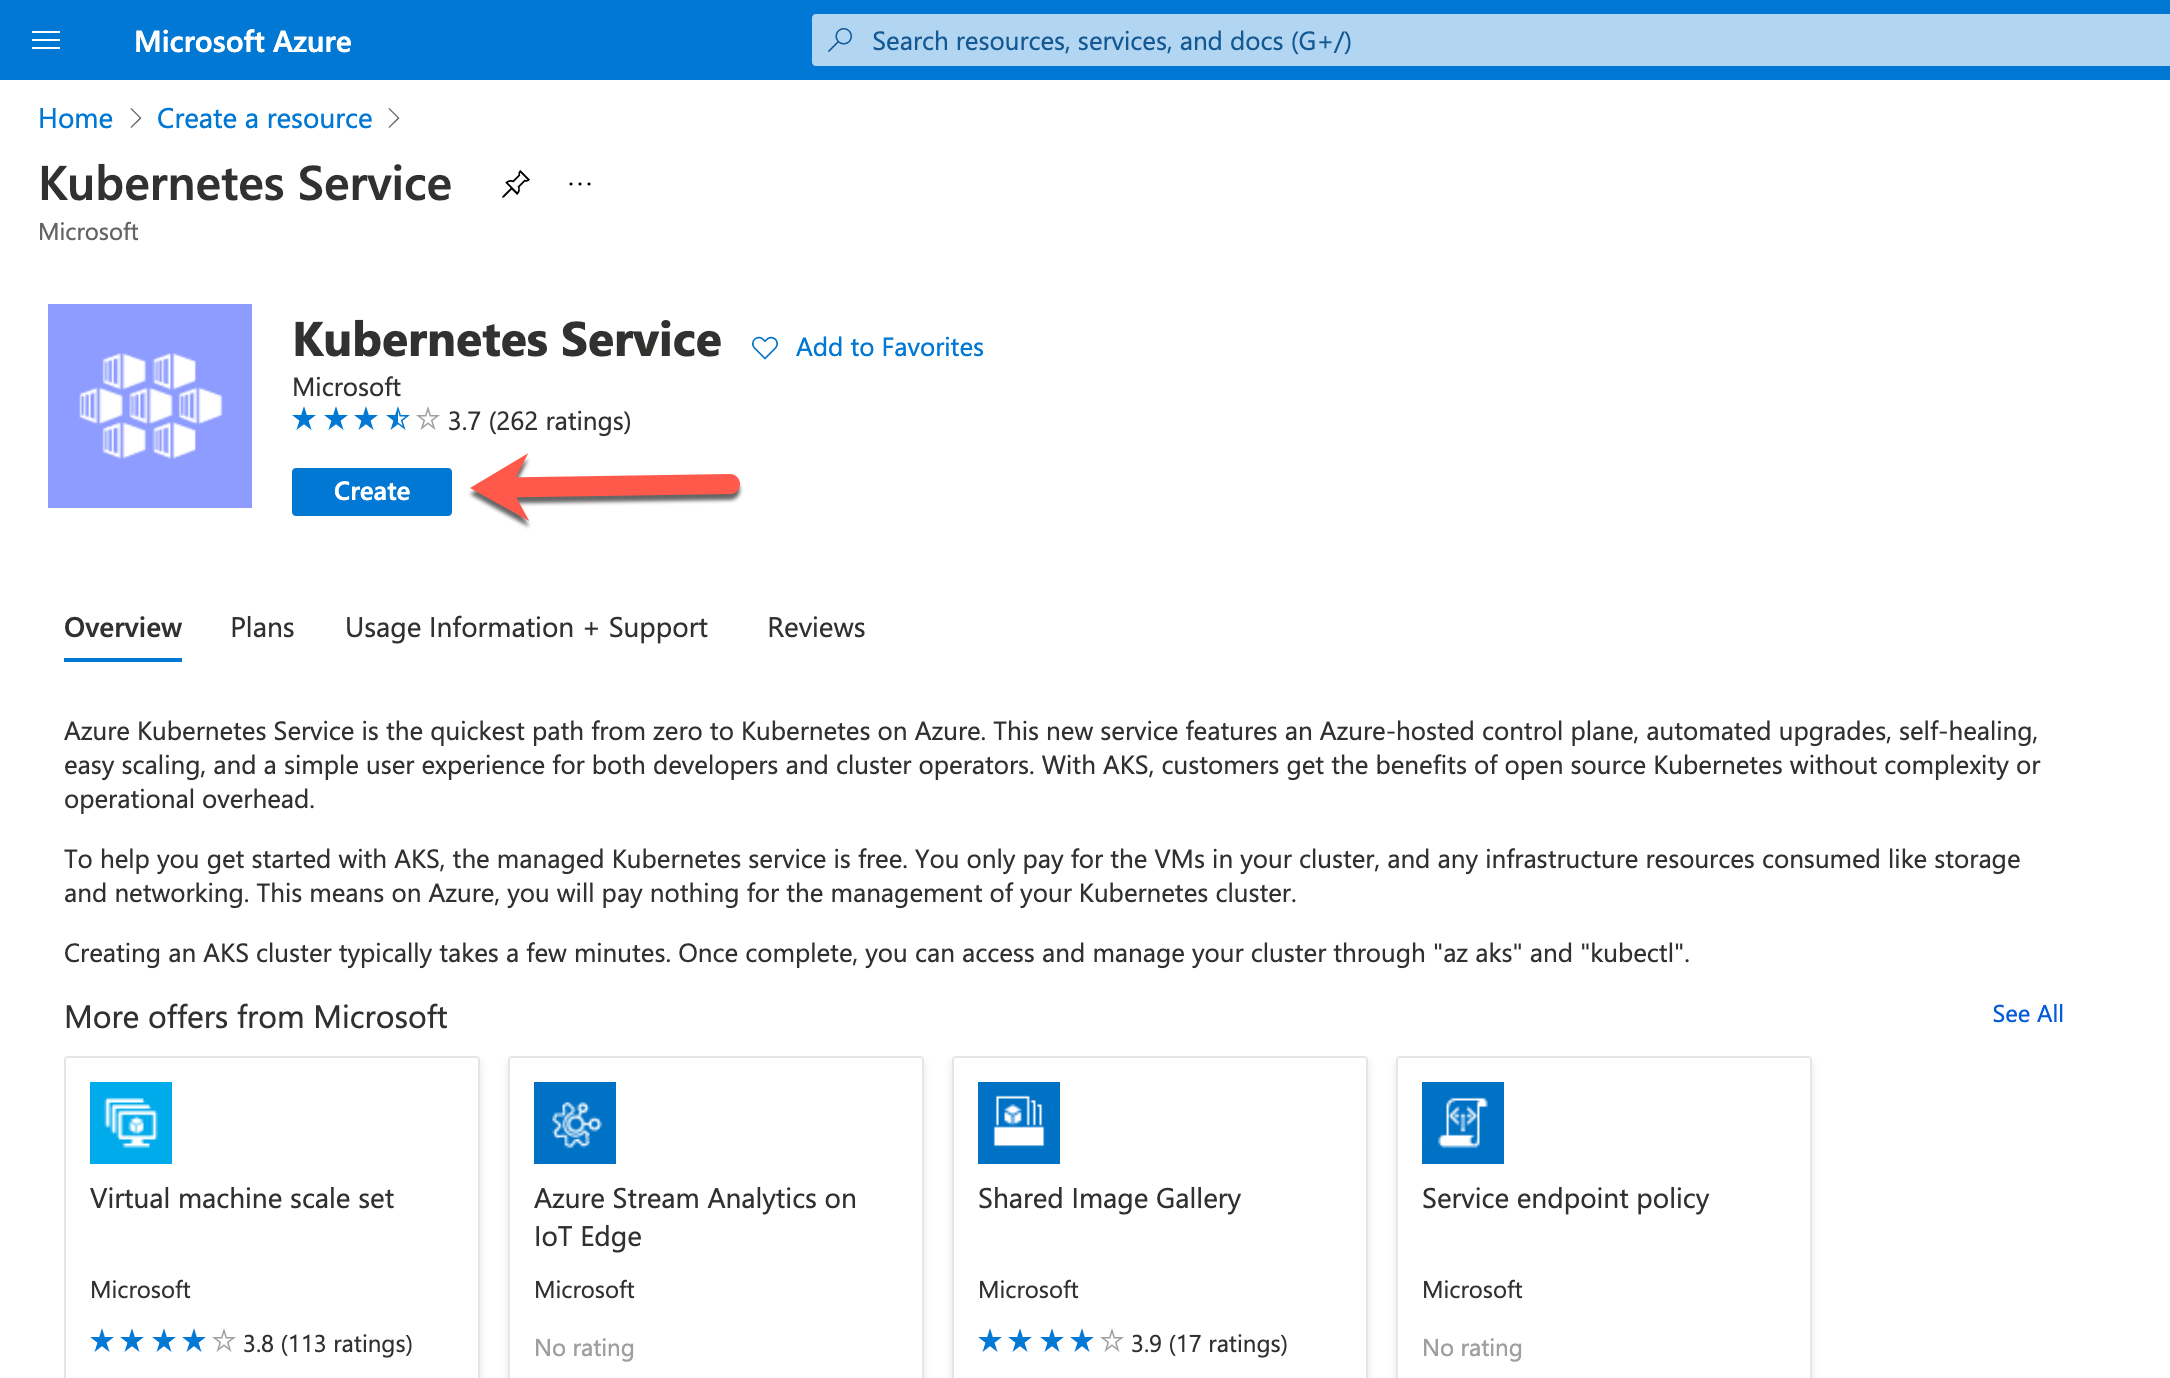
Search for Kubernetes Service and once you get on the Kubernetes Service page click Create:
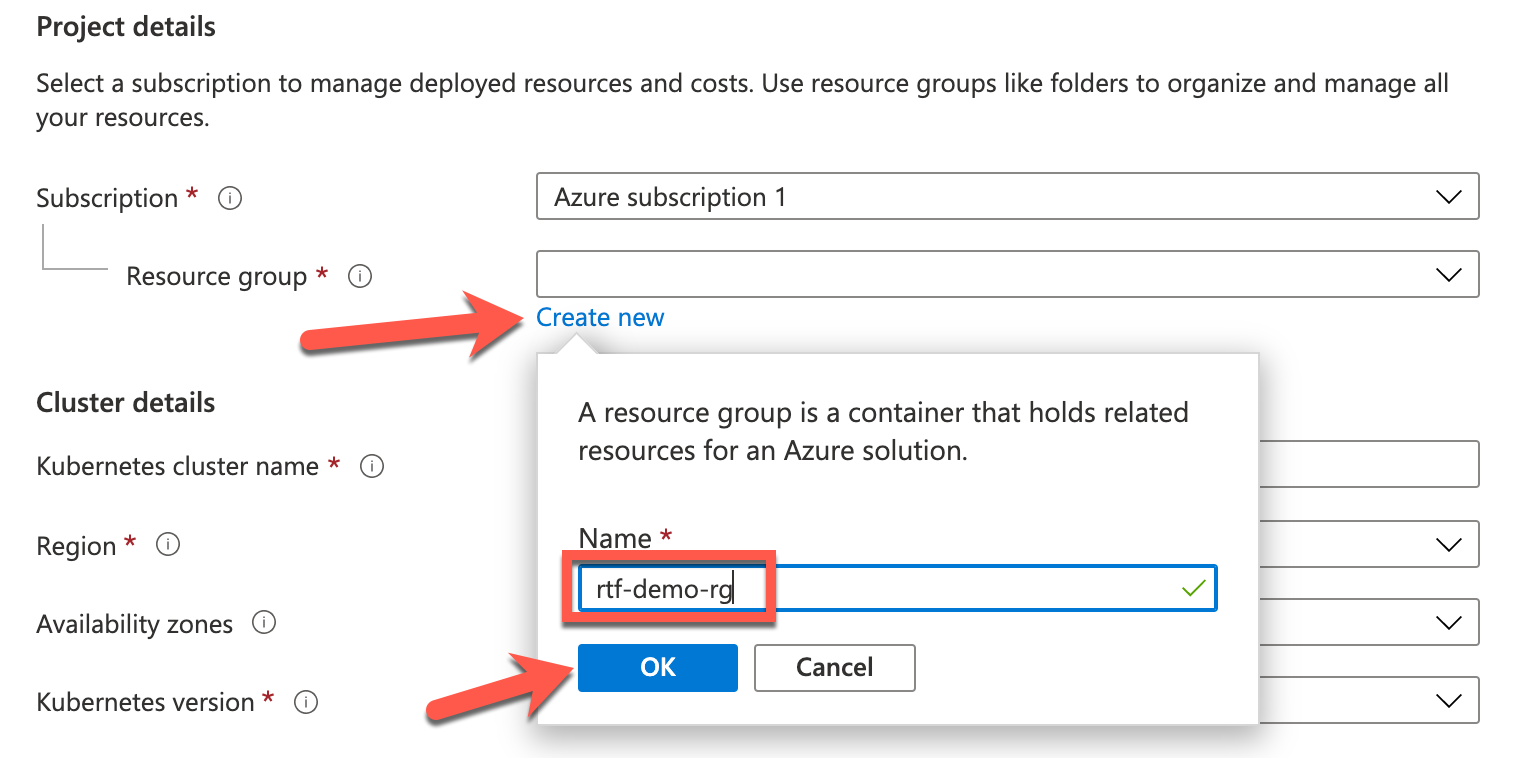
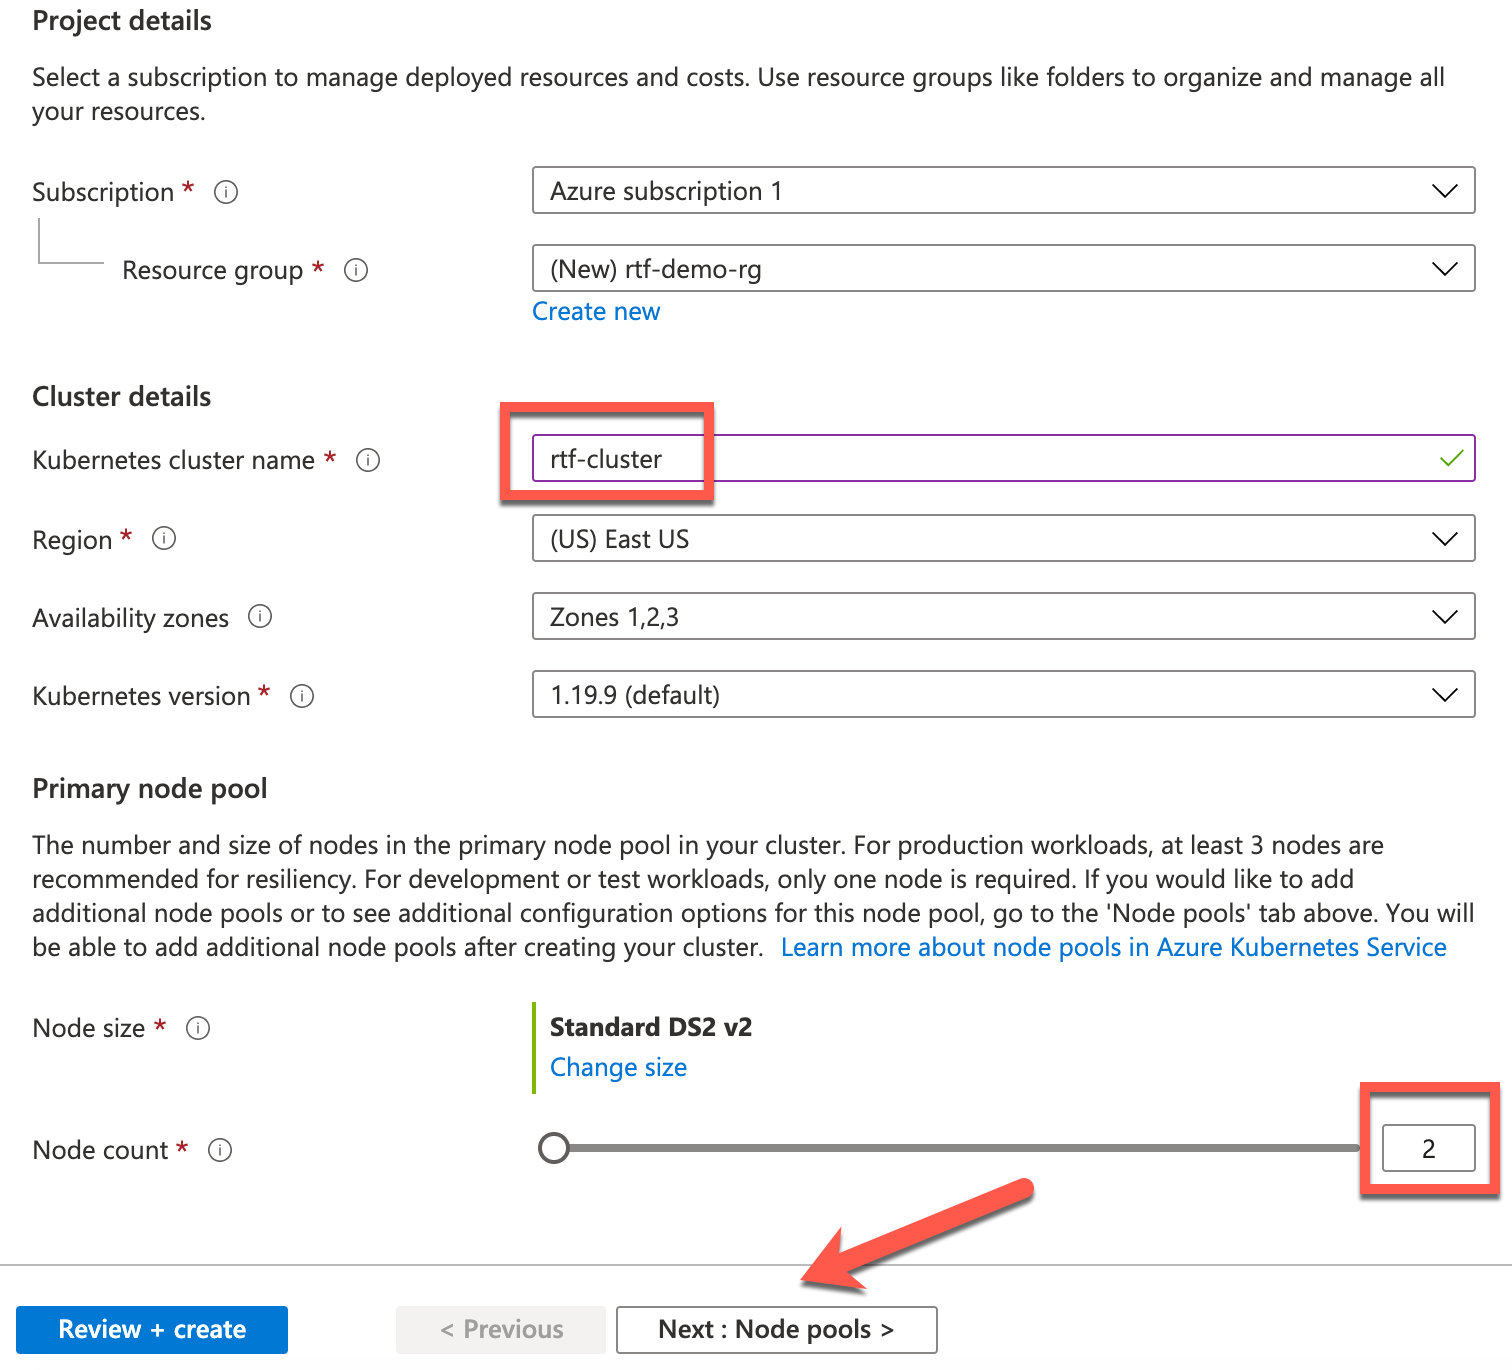
In the next screen, you will define the basic configuration of your new cluster. Under Resource group click Create new and enter rtf-demo-rg for the resource group name and click OK.
Enter rtf-cluster for Kubernetes cluster name. If using free account change Node count to 2. The rest of the cluster details you can keep the defaults. Click Next: Node pools.
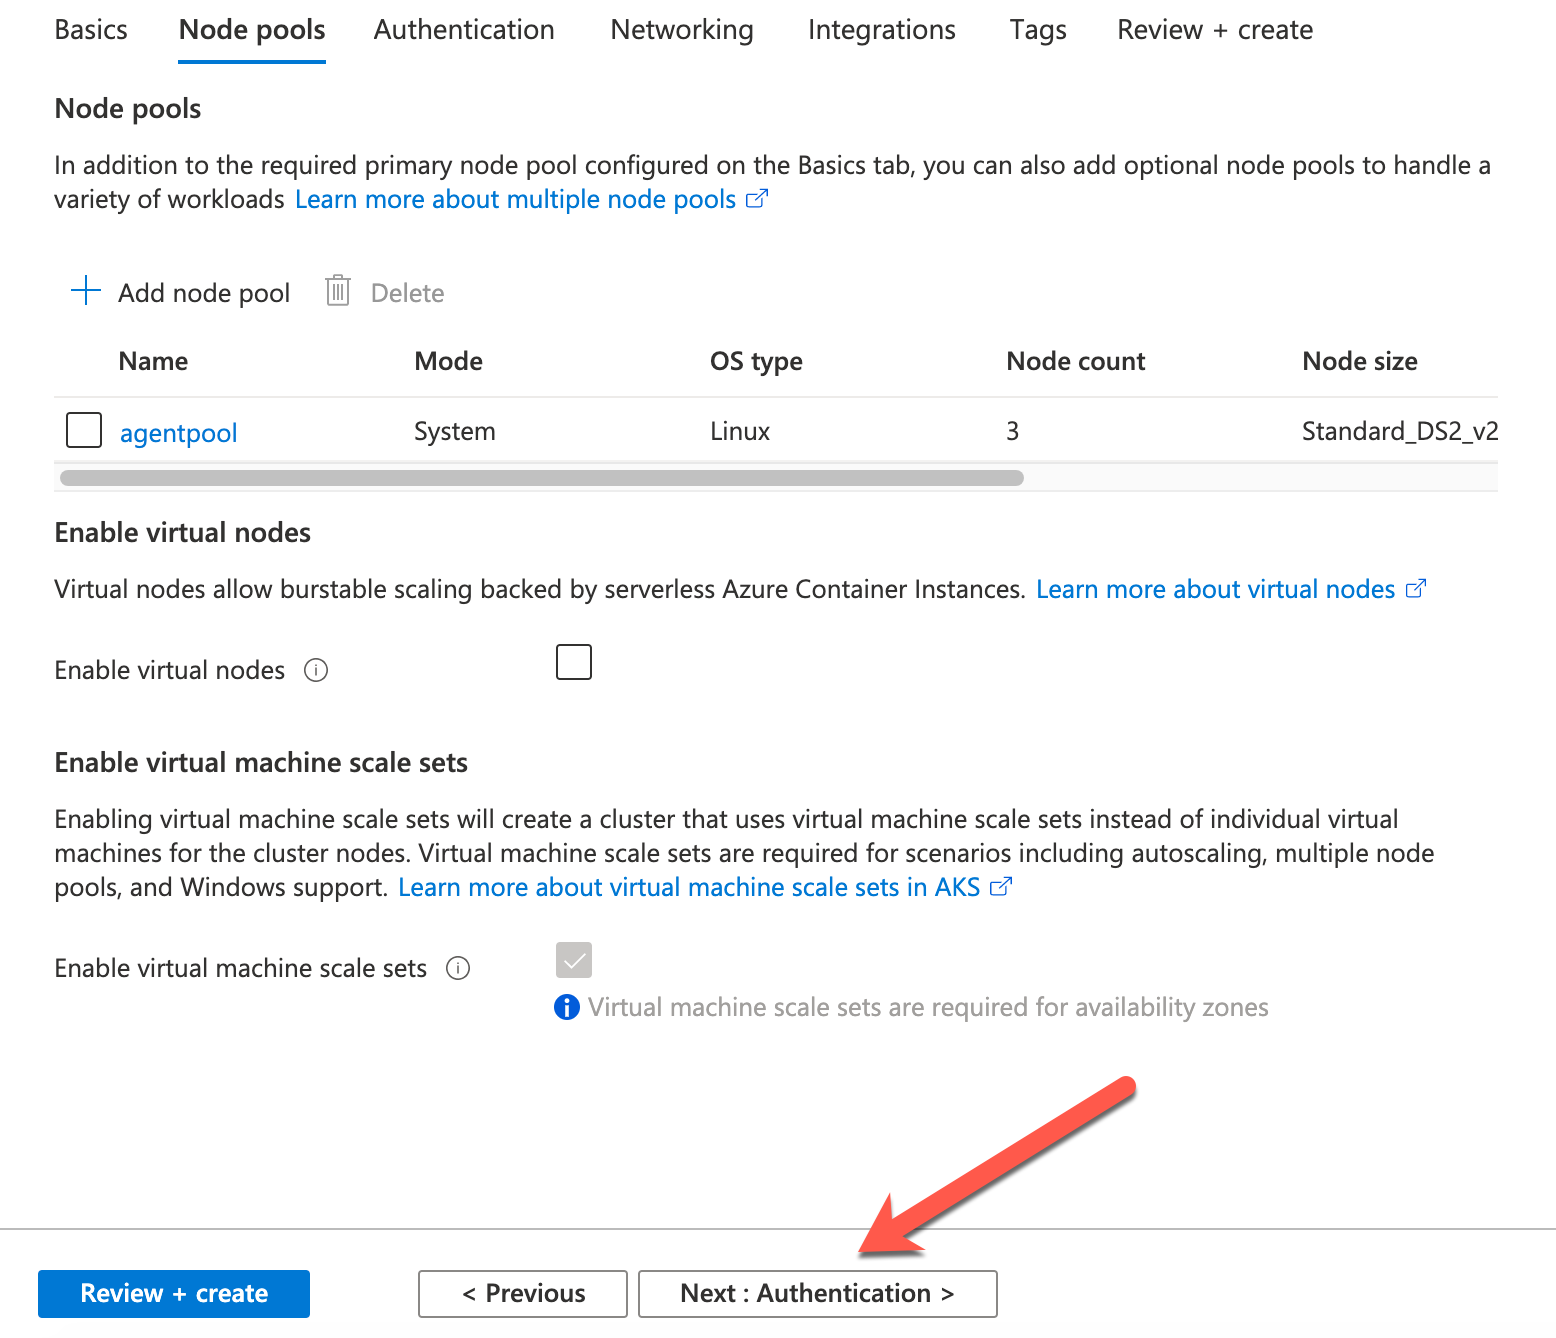
By default your RTF applications will be deployed together with the k8s services on the same nodes. If you want/need to segregate the k8s services from the applications you might want to create a separate nodepool. For the purpose of building a demo environment we can stick with the default nodepool (i.e. k8s/AKS services and Mule apps running on the same nodes). Click Next: Authentication.
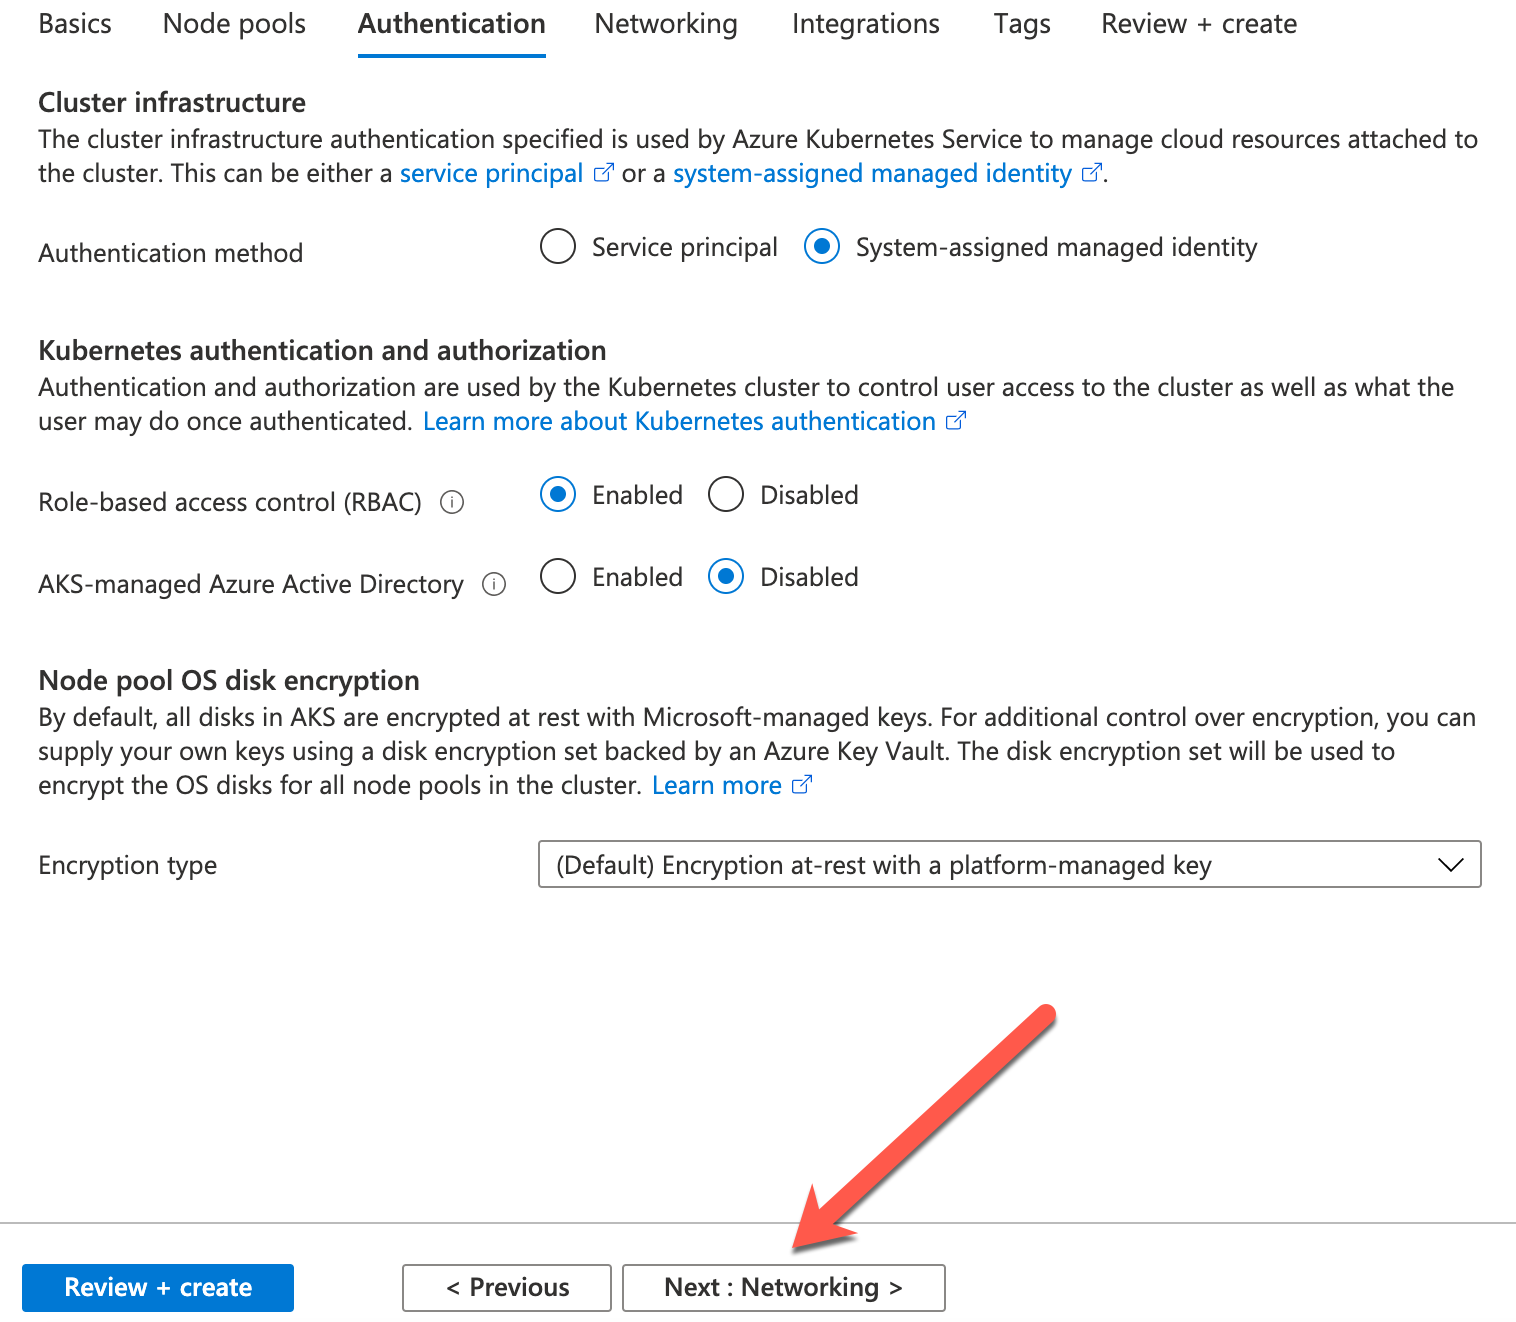
What user do you want to use to manage your K8S infrastructure? For simplicity let's have Azure create a new user. Leave defaults and click Next: Networking.
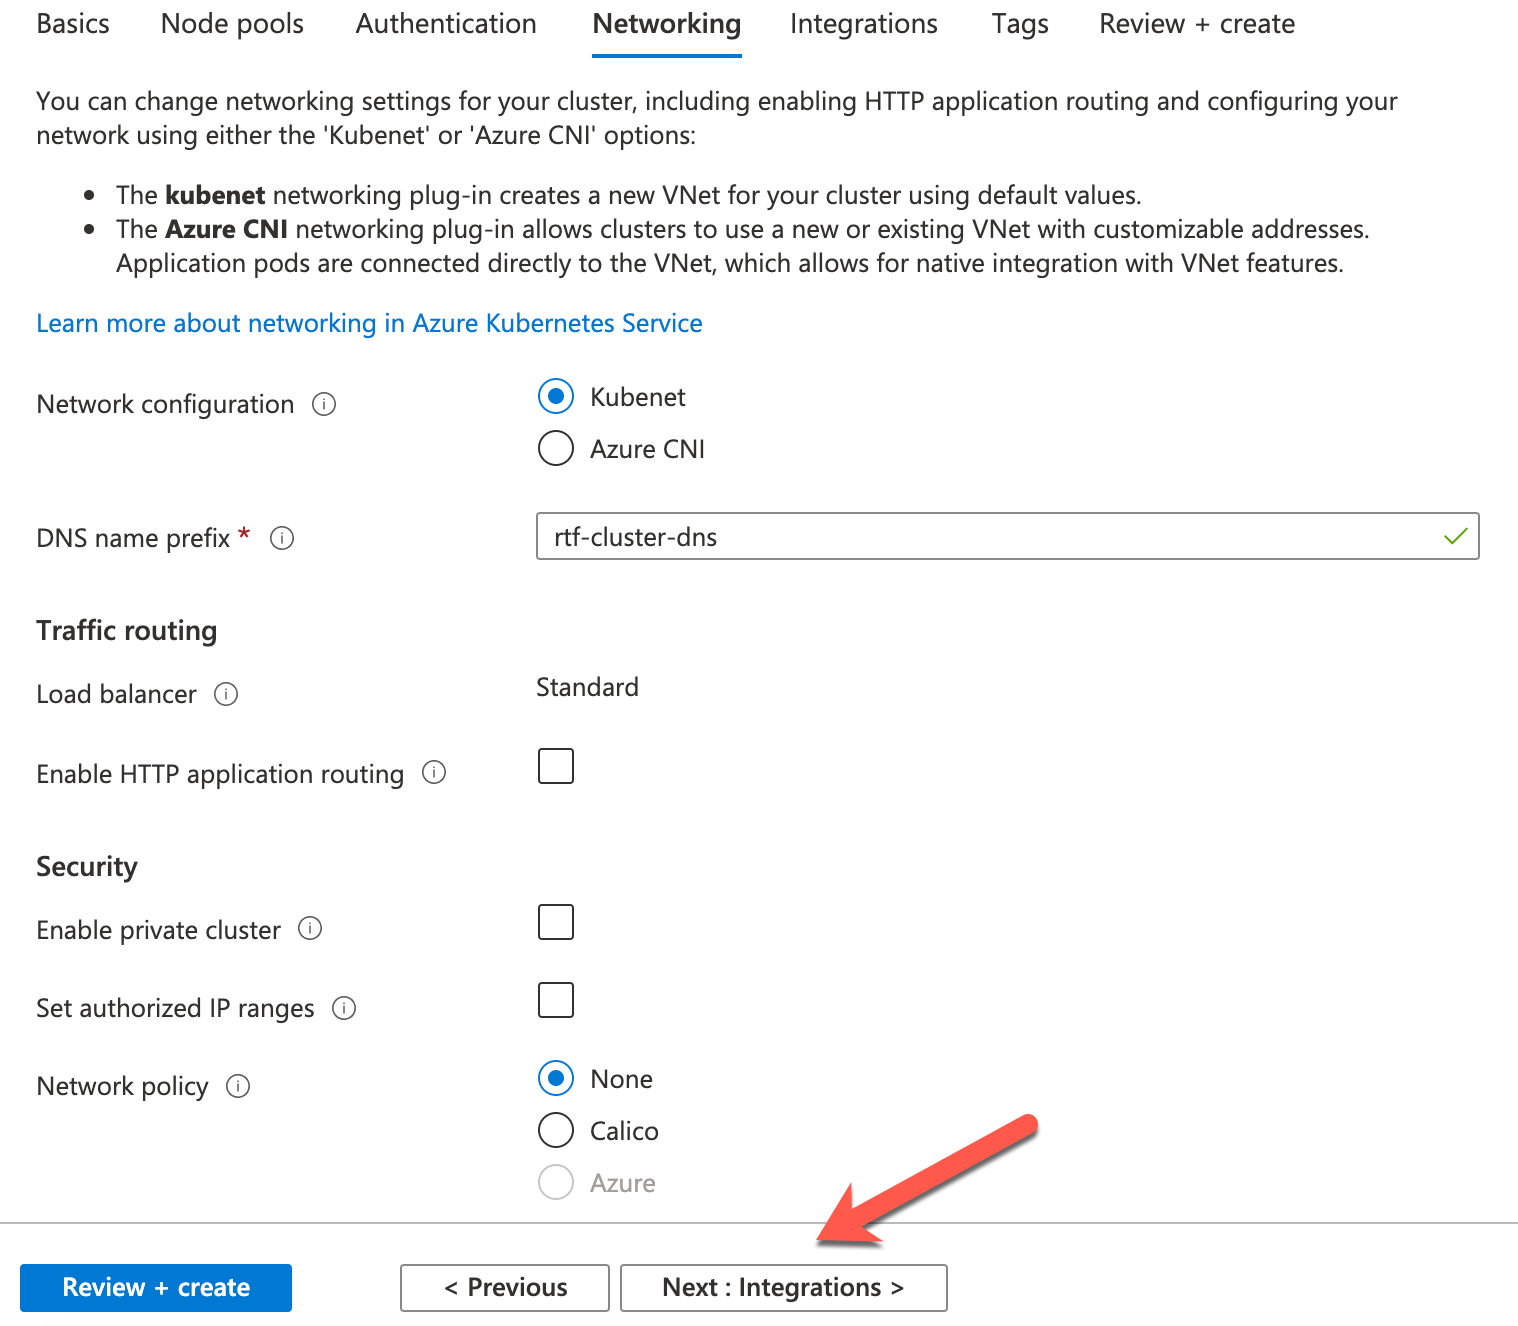
Leave all the defaults and click Next: Integrations.
Create a new docker registry where all images will be downloaded upon deployment. Click Create new and enter rtfdemocr for registry name. Leave all other defaults and click Review + create.
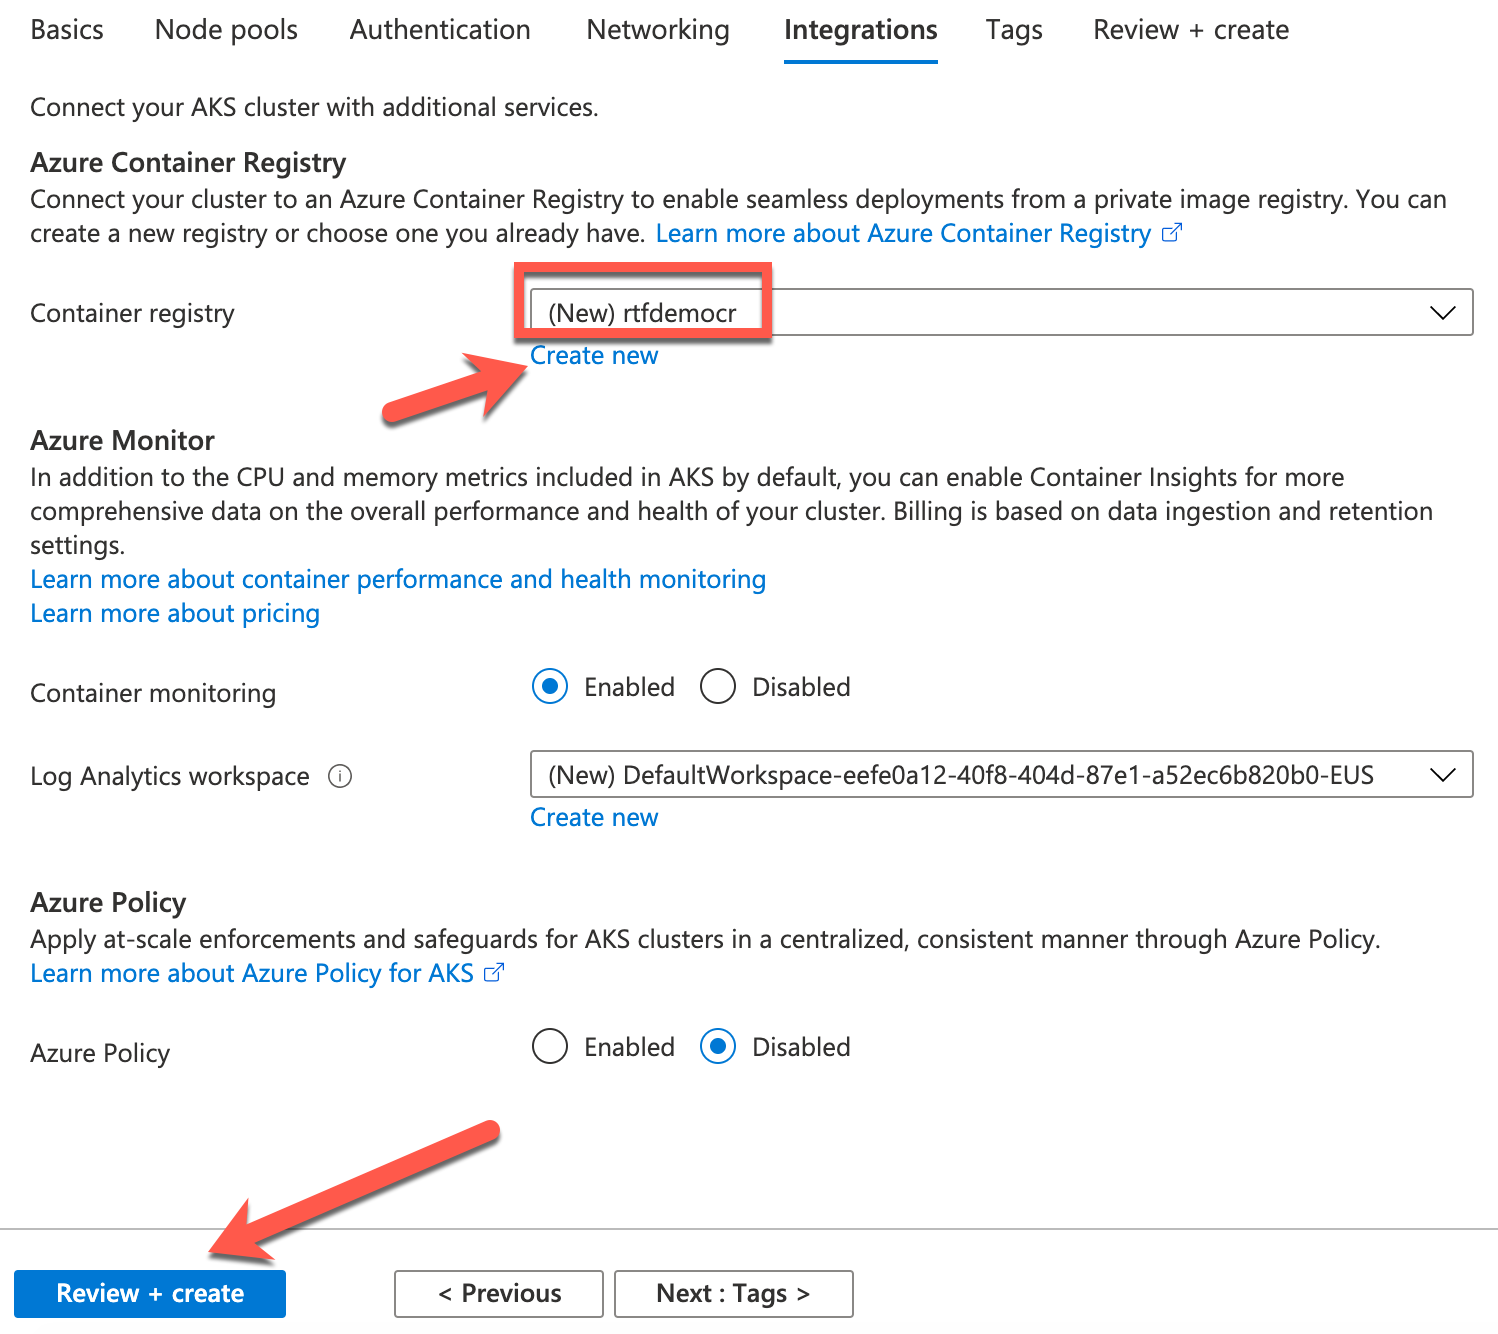
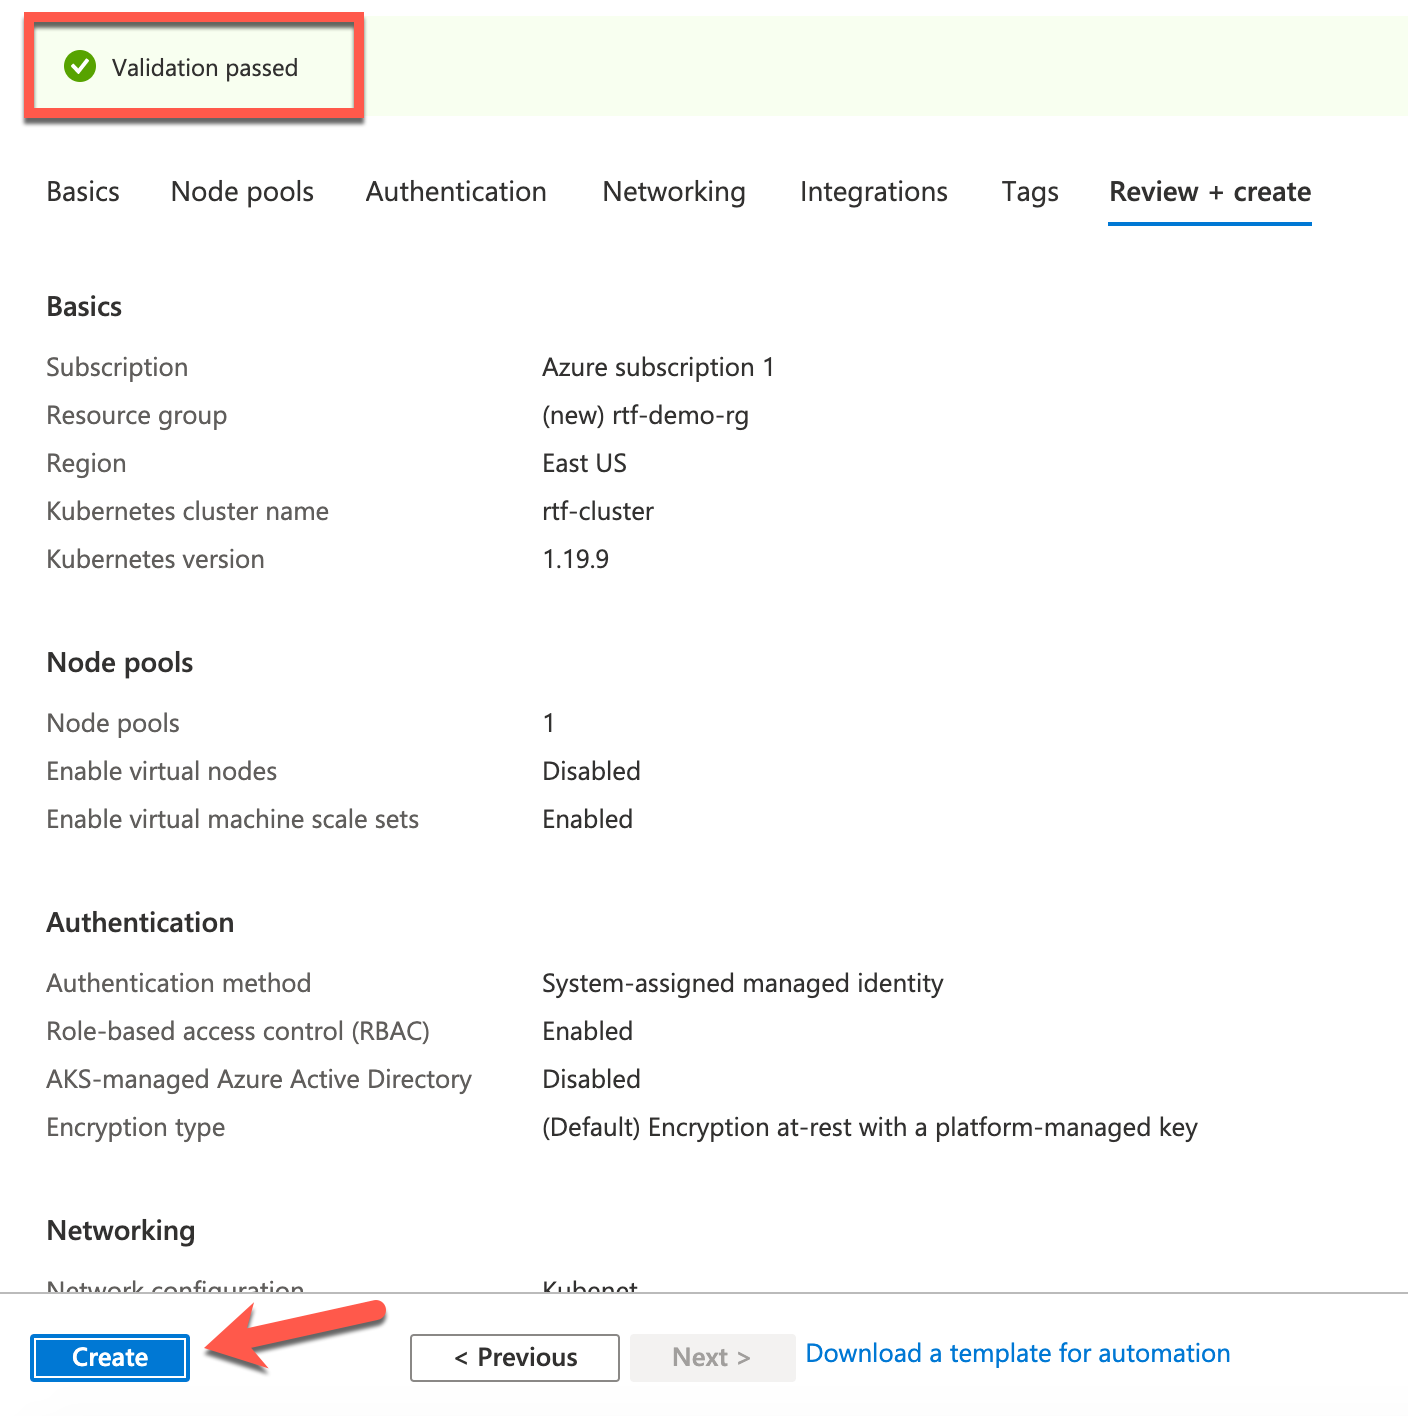
You should see Validation passed if not go back and fix any errors. Click Create.
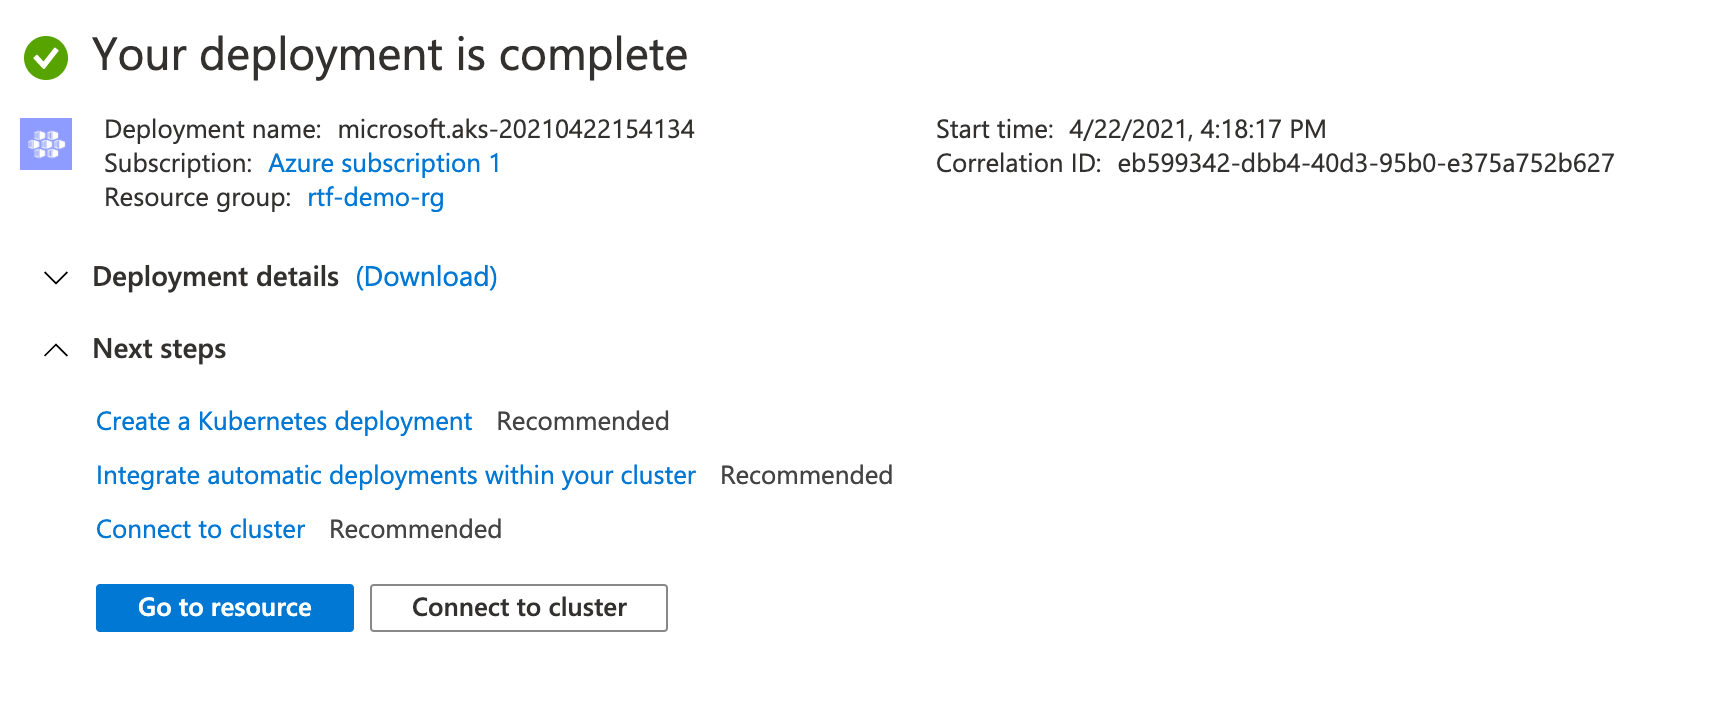
Deployment will take some time. Once completed you should see Your deployment is complete.
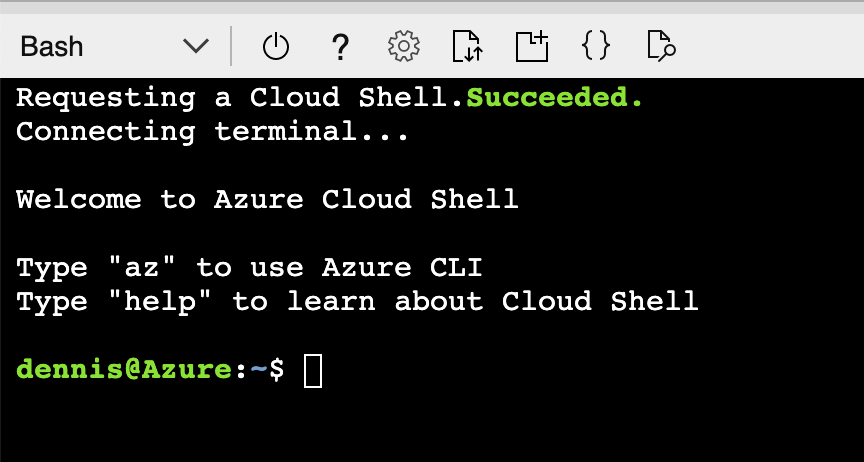
We will be using Azure Cloud Shell to keep the configuration simple. From the top menu bar click the shell button to open Azure Cloud Shell. This cookbook will be using Bash.
Click Go to resource. This is navigate you to the rtf-cluster details page. Click Connect to view commands for connecting to the cluster.
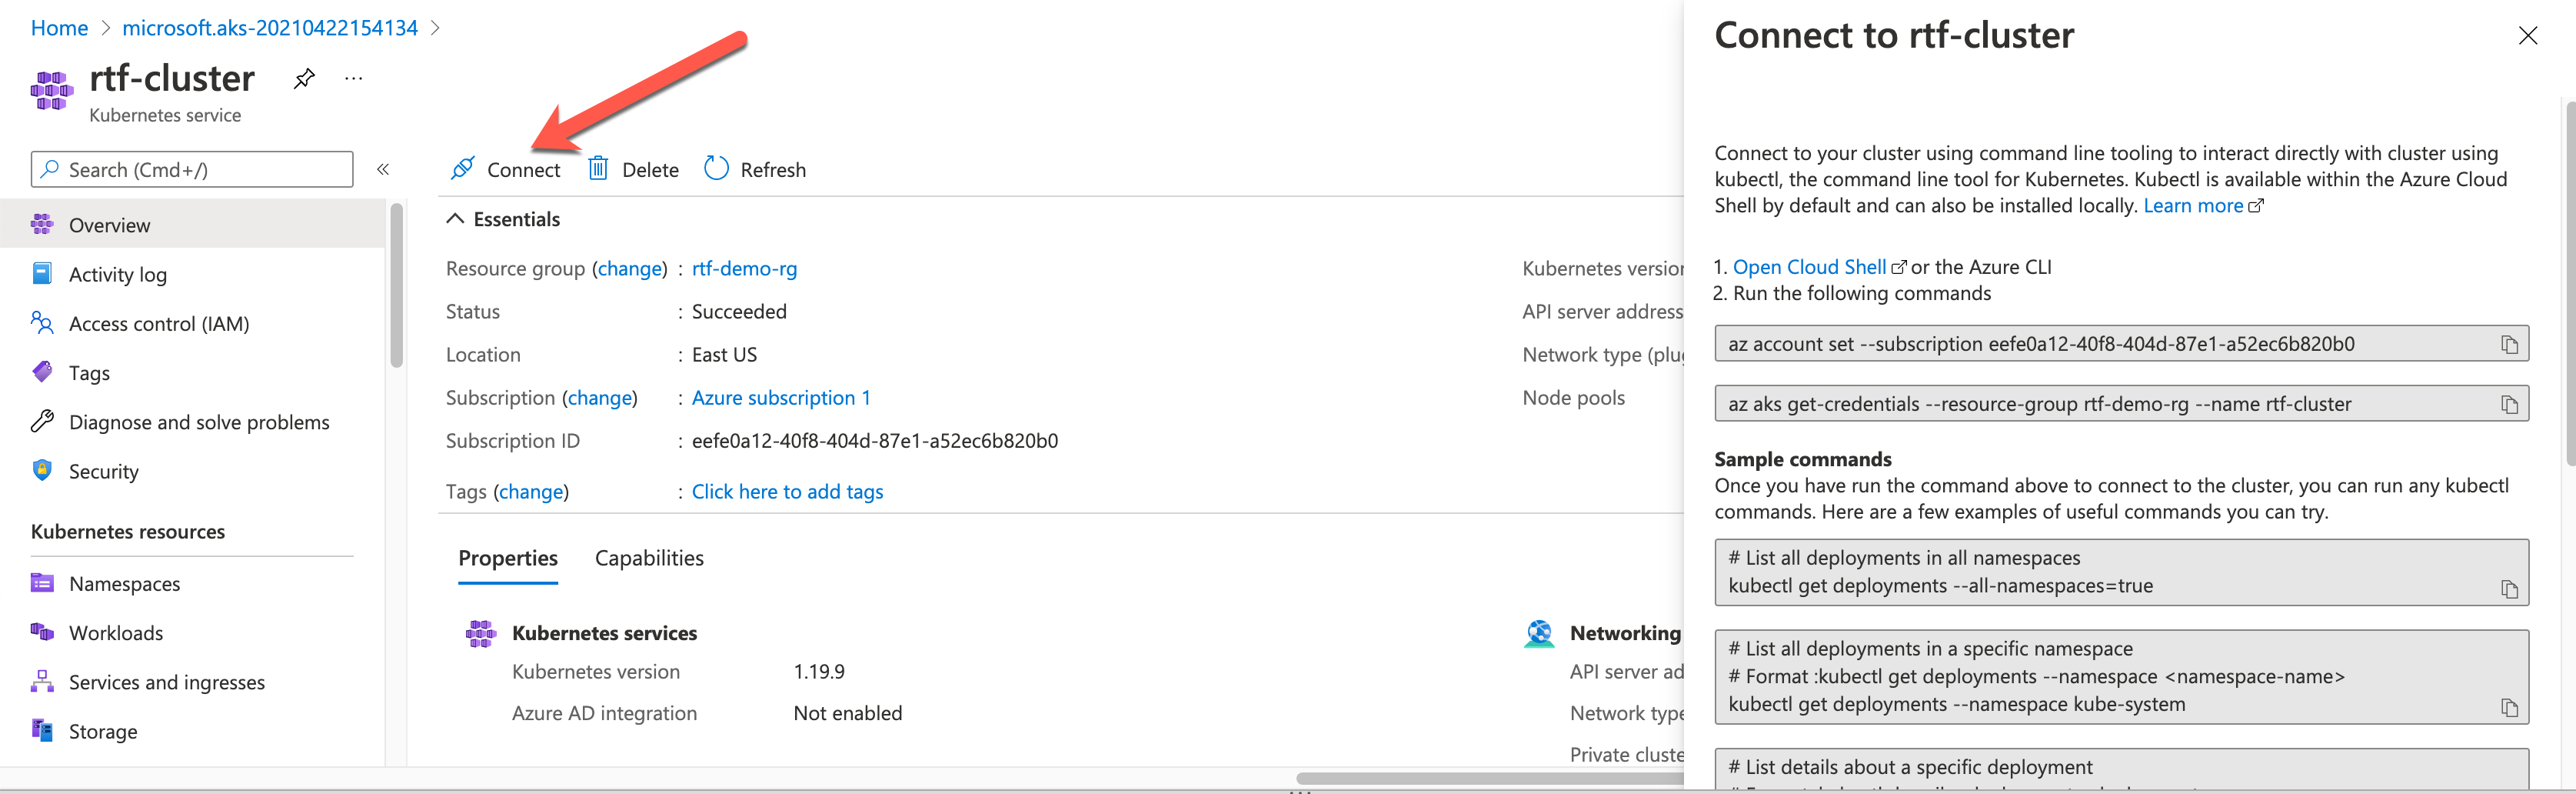
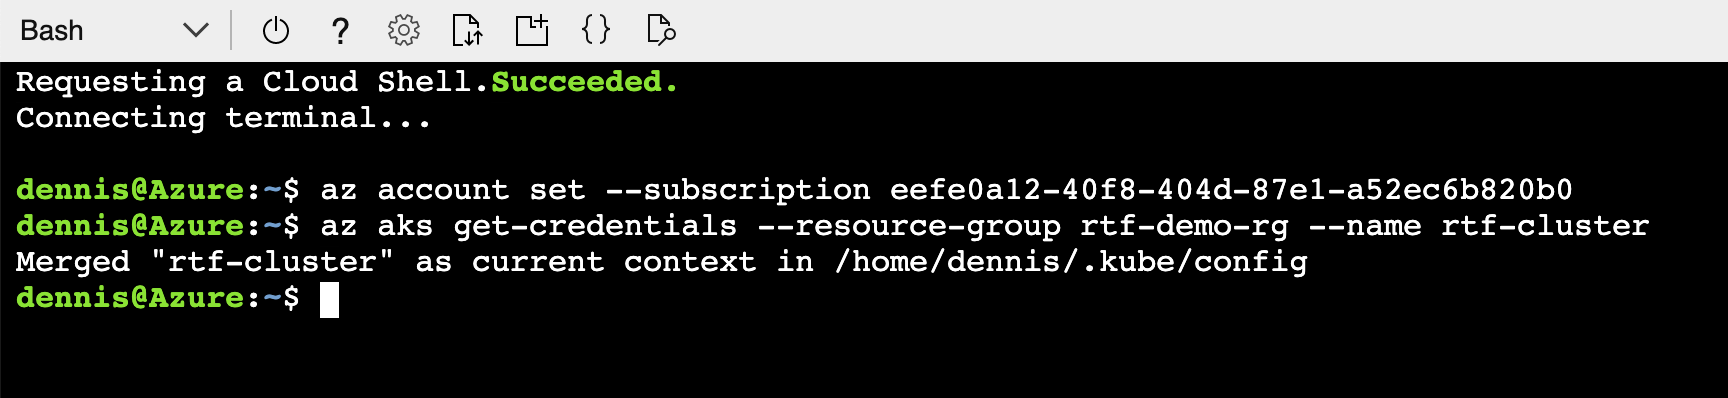
Copy and execute the commands to set the subscription and connect to your cluster.
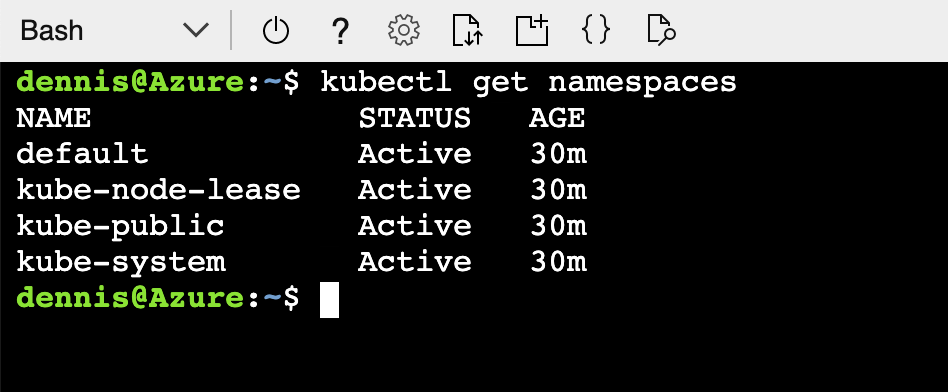
Next run the following command to verify that you cluster is running.
kubectl get namespaces
rtfctl is supported on Windows, MacOS (Darwin), and Linux. Download this utility using the URL below for the Linux distribution:
curl -L https://anypoint.mulesoft.com/runtimefabric/api/download/rtfctl/latest -o rtfctl
Change file permissions for the rtfctl command
chmod +x rtfctl

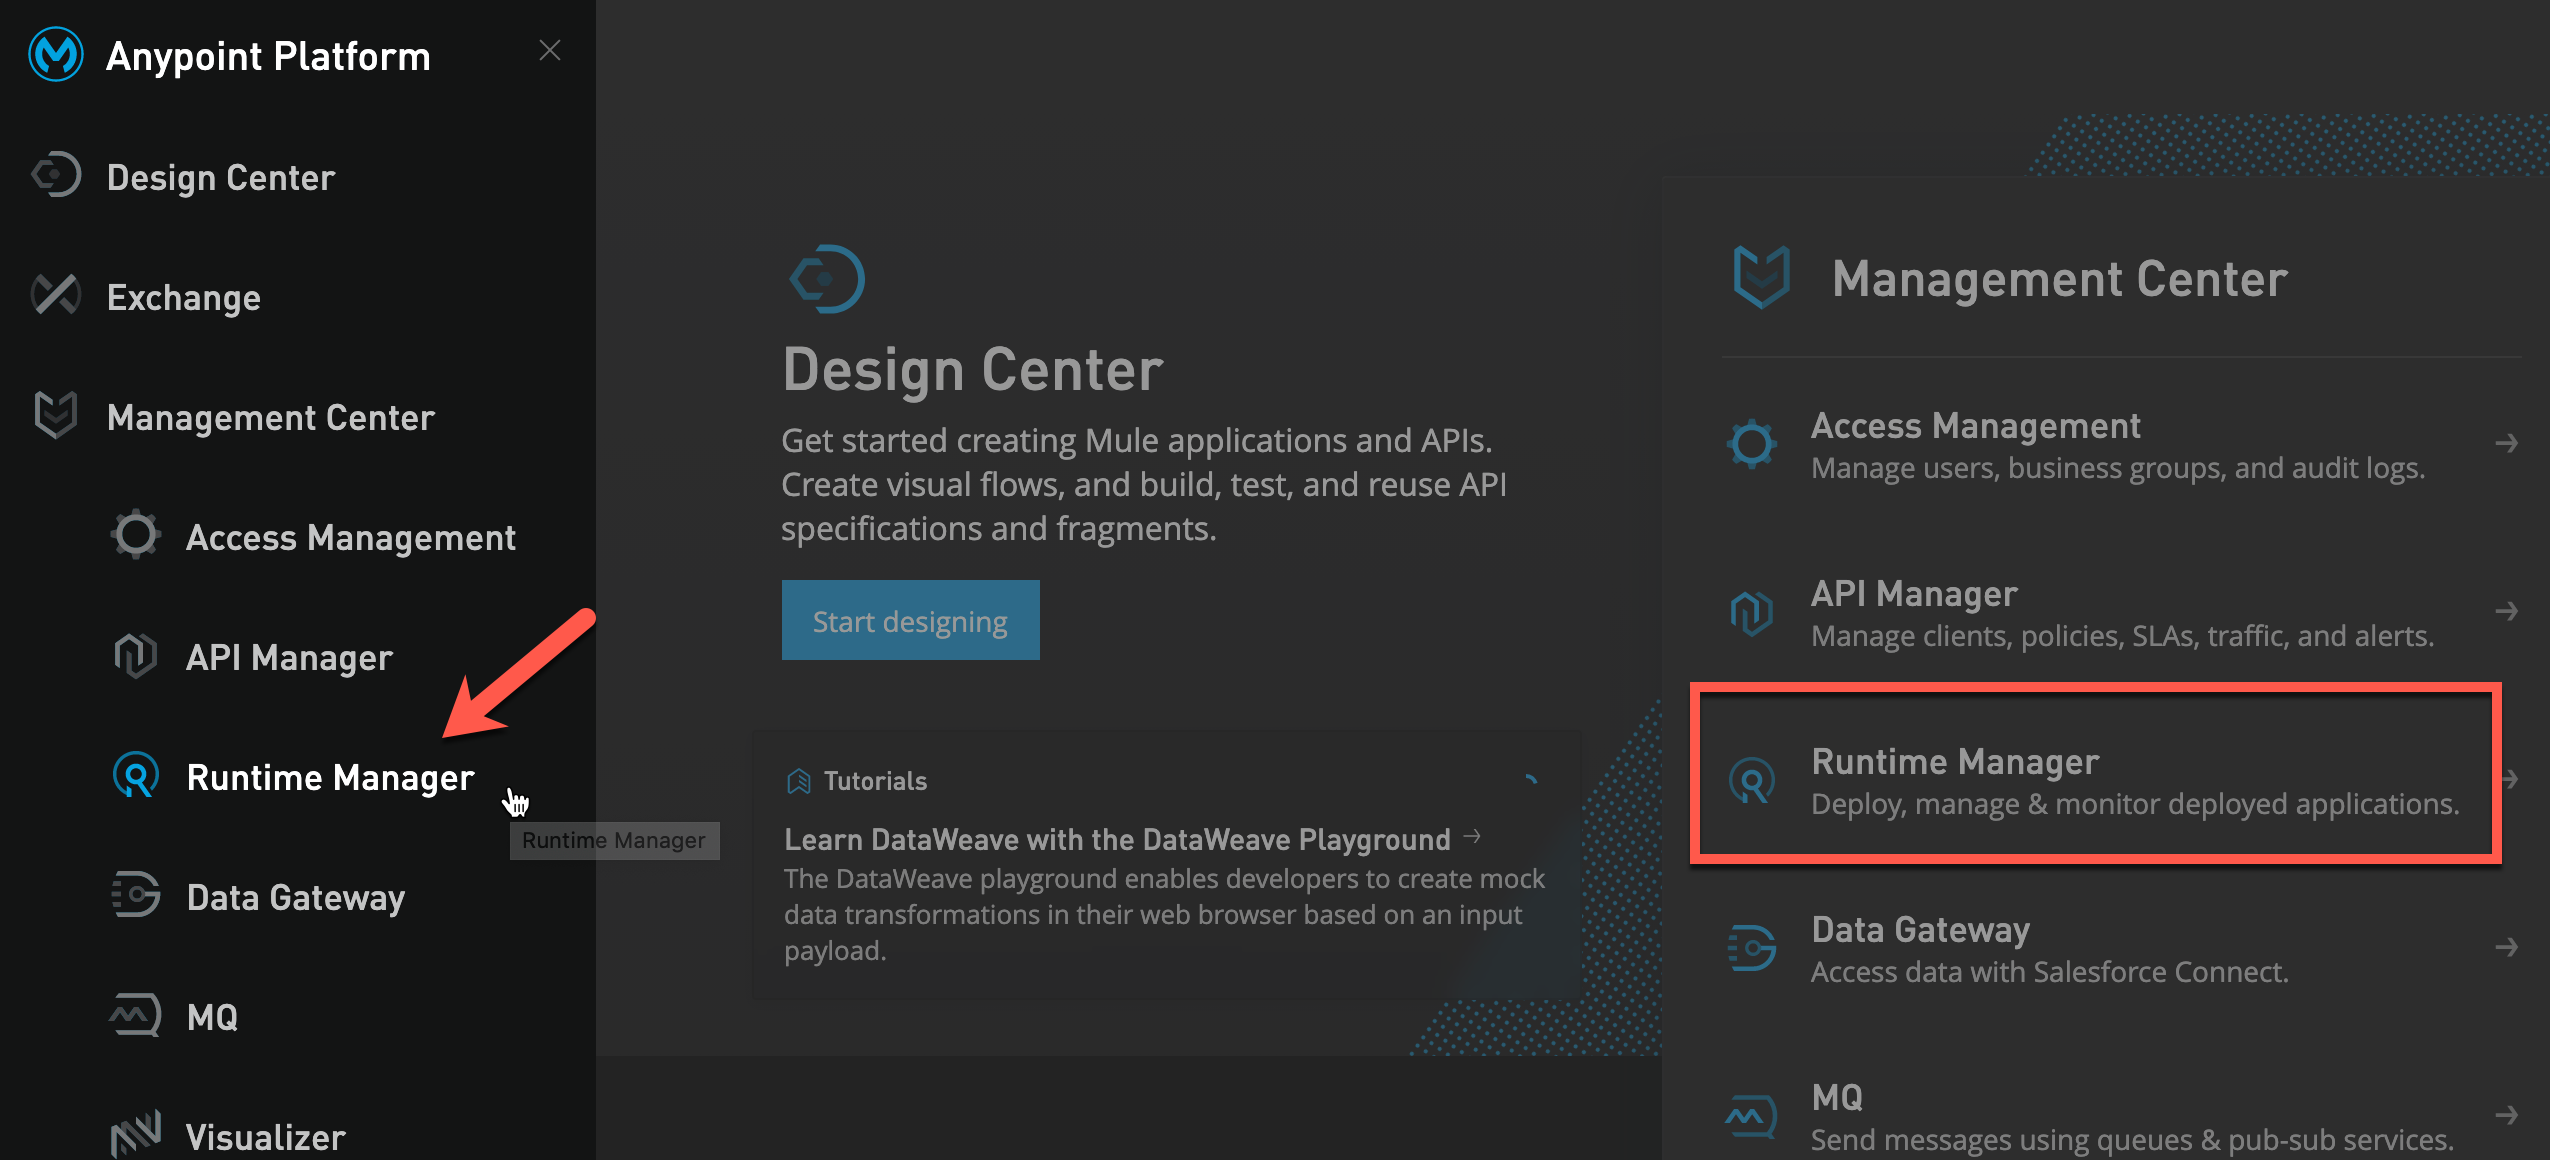
Open a new tab in your browser and enter the following URL to login to Anypoint Platform. Enter Username and Password and click Sign In. From the main page click Runtime Manager or use the left navigation bar to navigate to Runtime Manager.
On left-hand menu, click Runtime Fabrics then click Create Runtime Fabric. Enter name rtf-on-aks and select Azure Kubernetes Service. Click Next.

Click Accept on Support responsibility pop-up. We are now ready to install RTF. Click the Copy icon to copy the activation code to your clipboard.
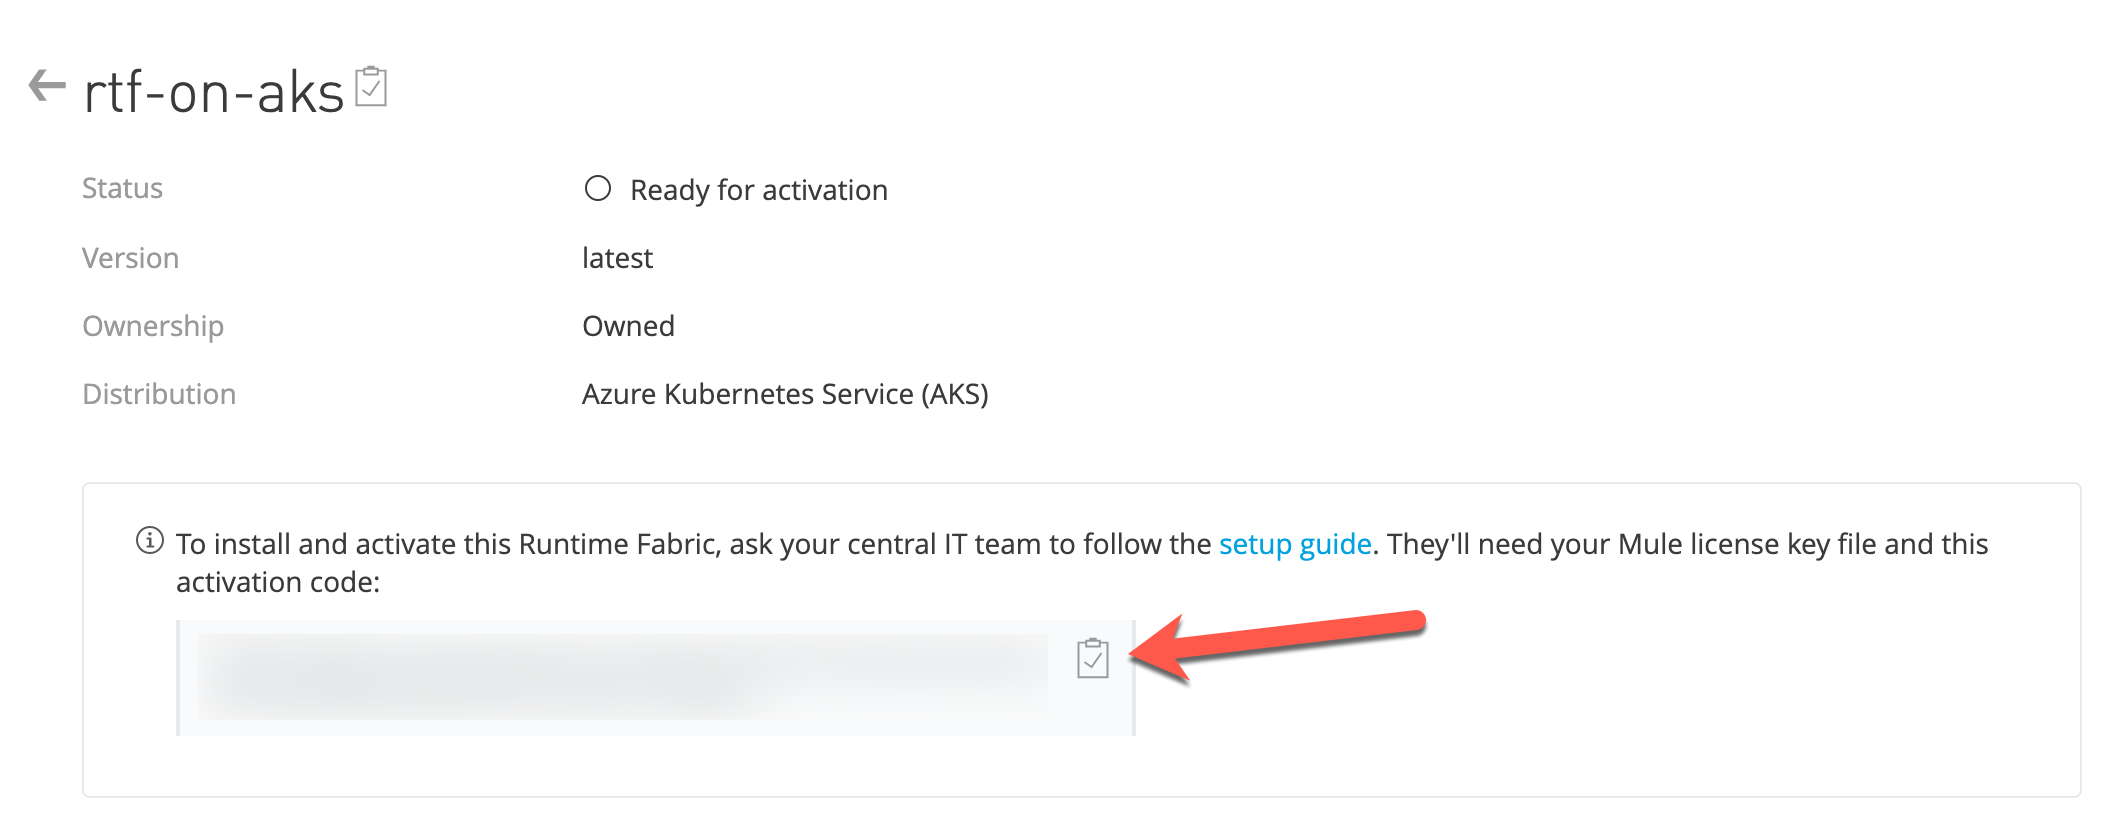
Switch back to the Azure. Using the activation code that you copied run the following command:
./rtfctl validate {activation_data}
The validate option verifies that: The Kubernetes environment is running. All required components exist. All required services are available. The rtfctl command outputs any incompatibilities with the Kubernetes environment.

If validate is successful we are now ready to install RTF. Using the activation code run the following command to install RTF:
./rtfctl install {activation_data}
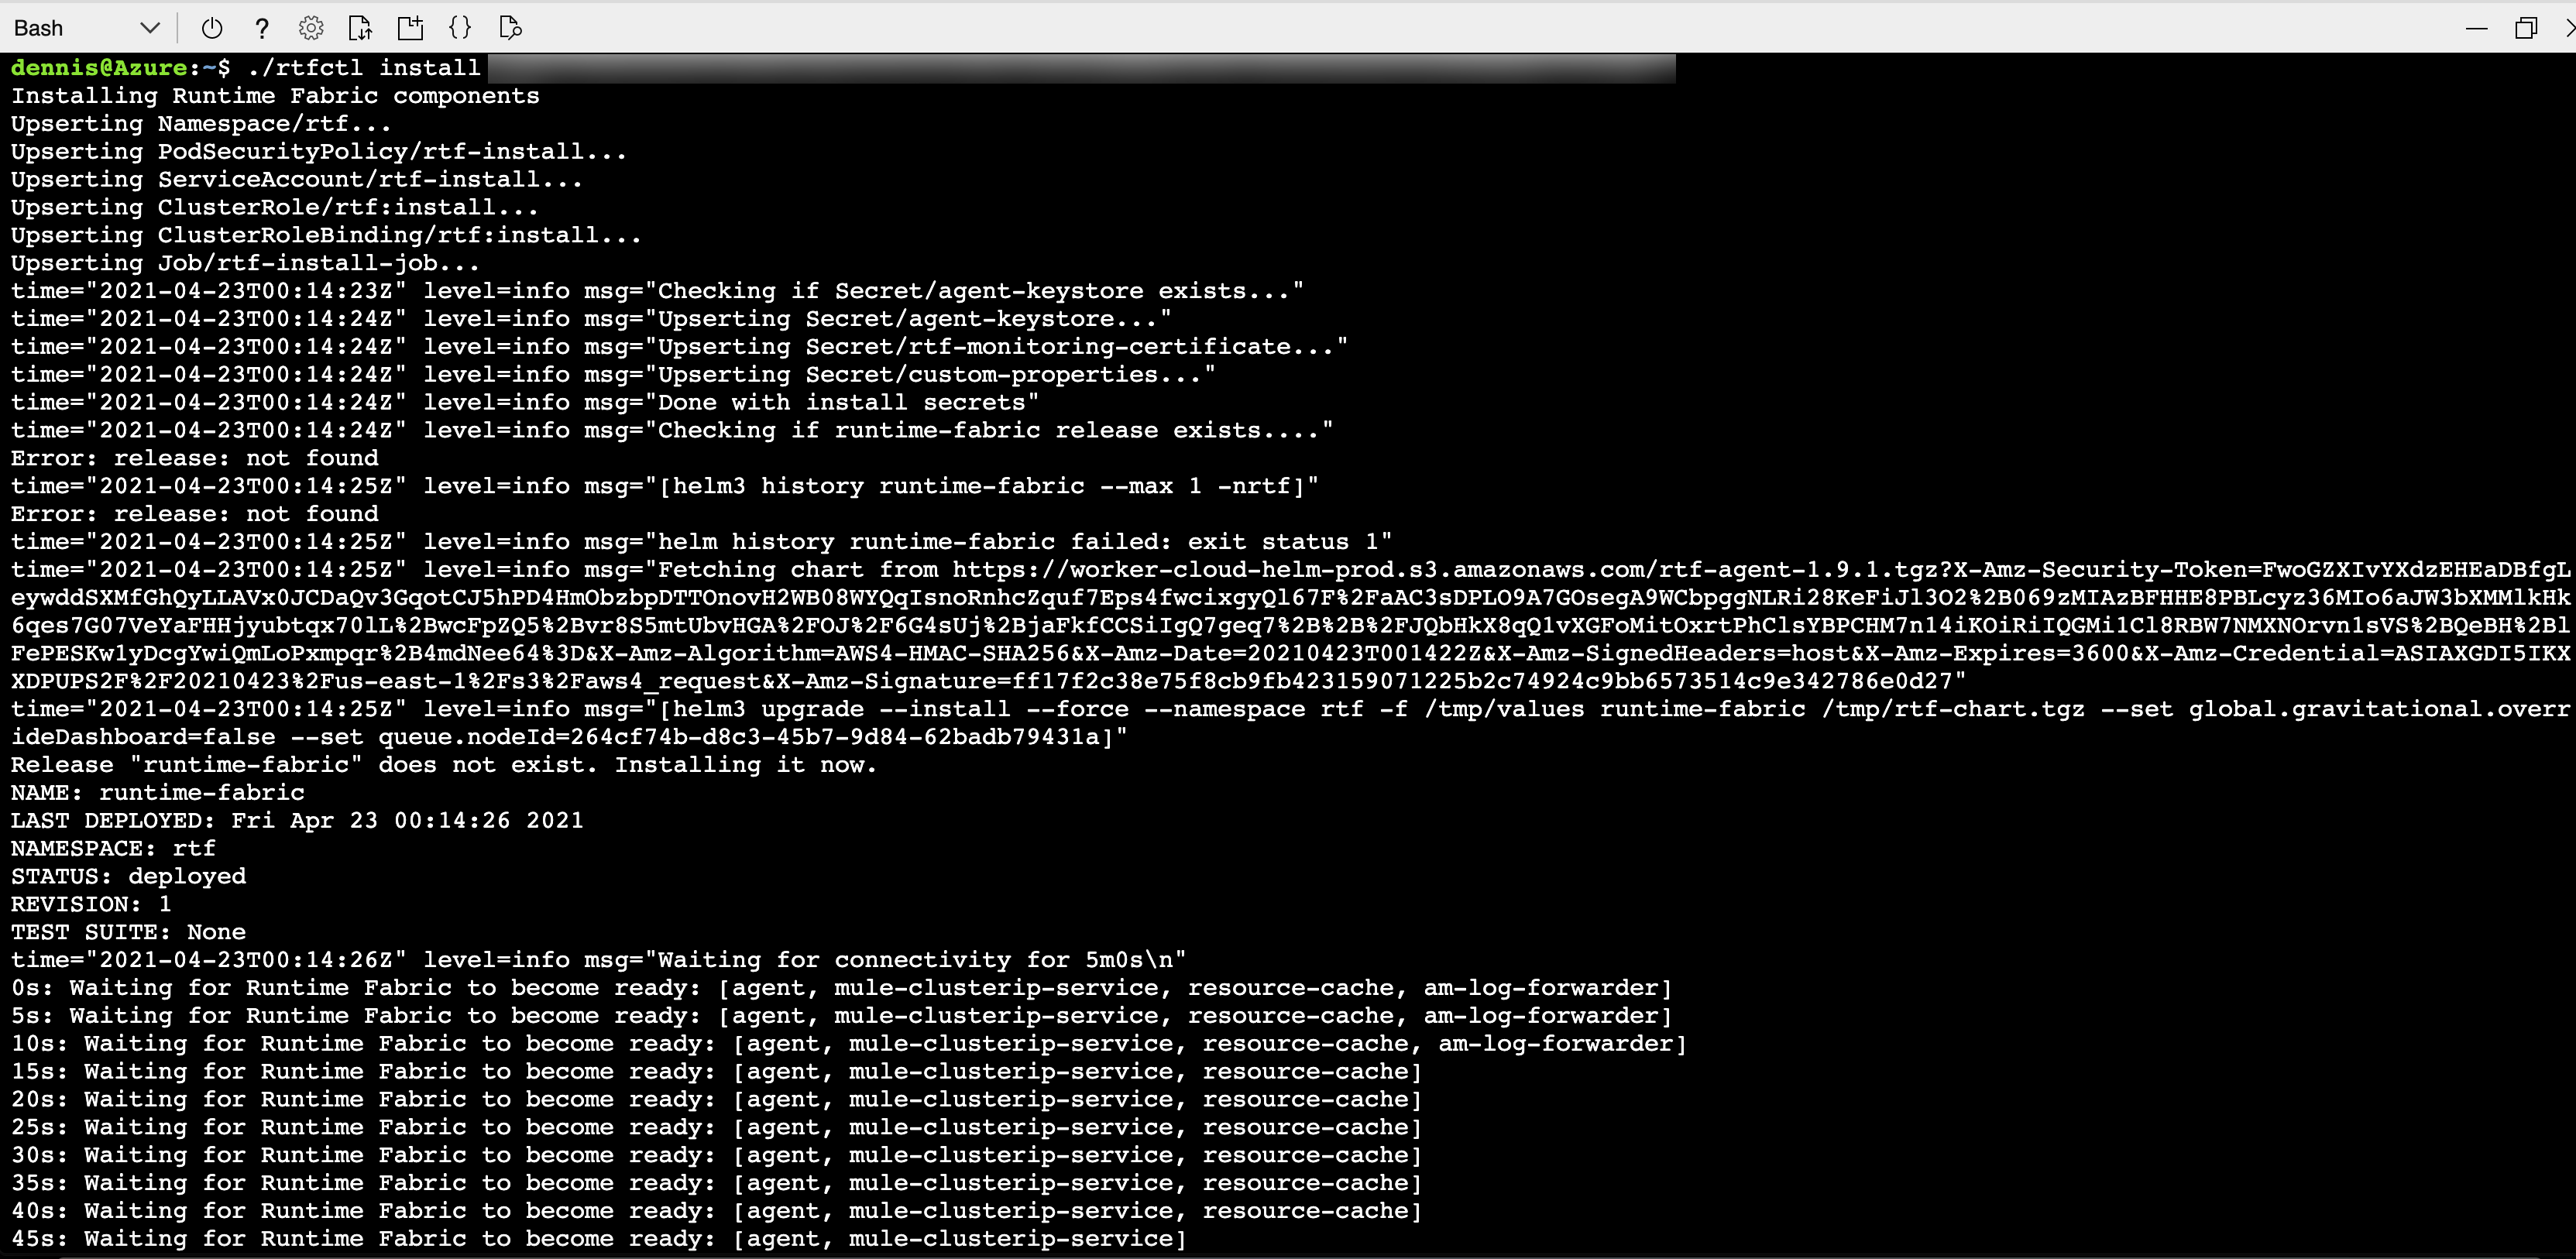
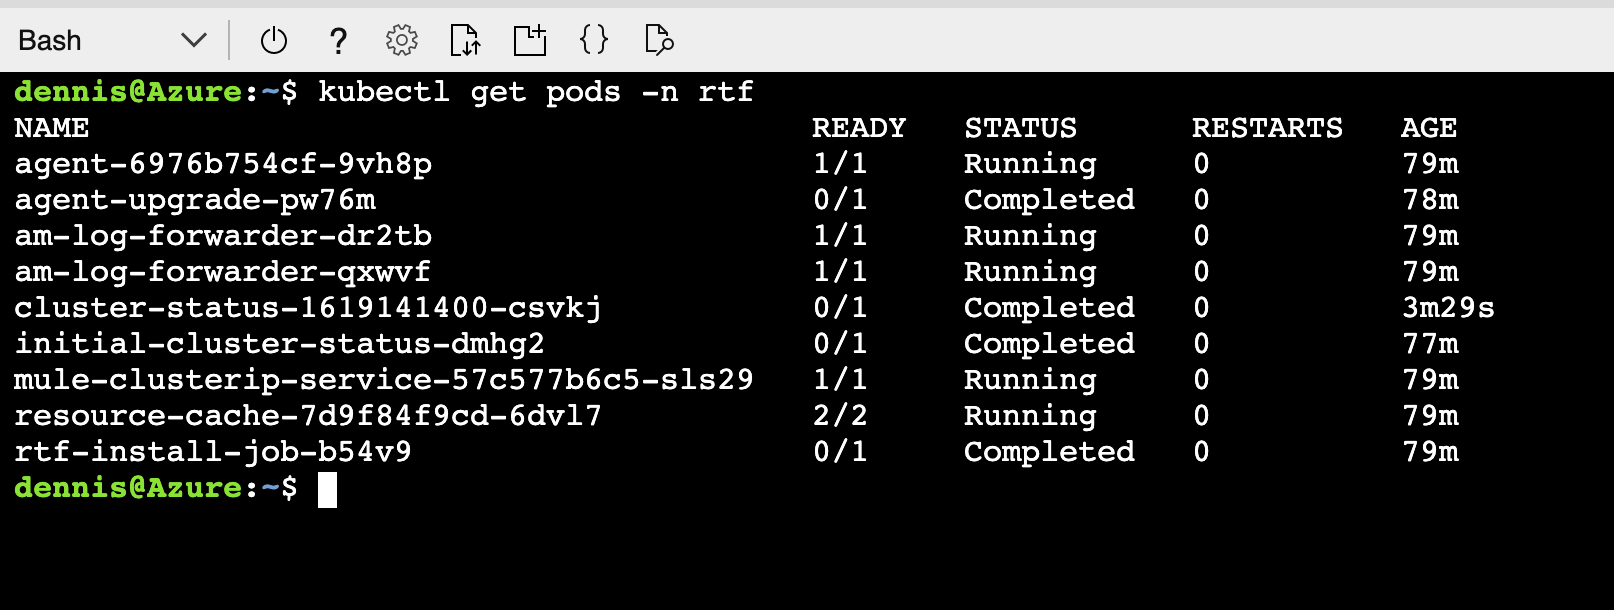
If everything went well, you will see Runtime Fabric is ready. and the installation exits without errors. At this point, validate the installation with these steps. Verify that rtf namespace has been created and all pods are running. Run the following command:
kubectl get pods -n rtf
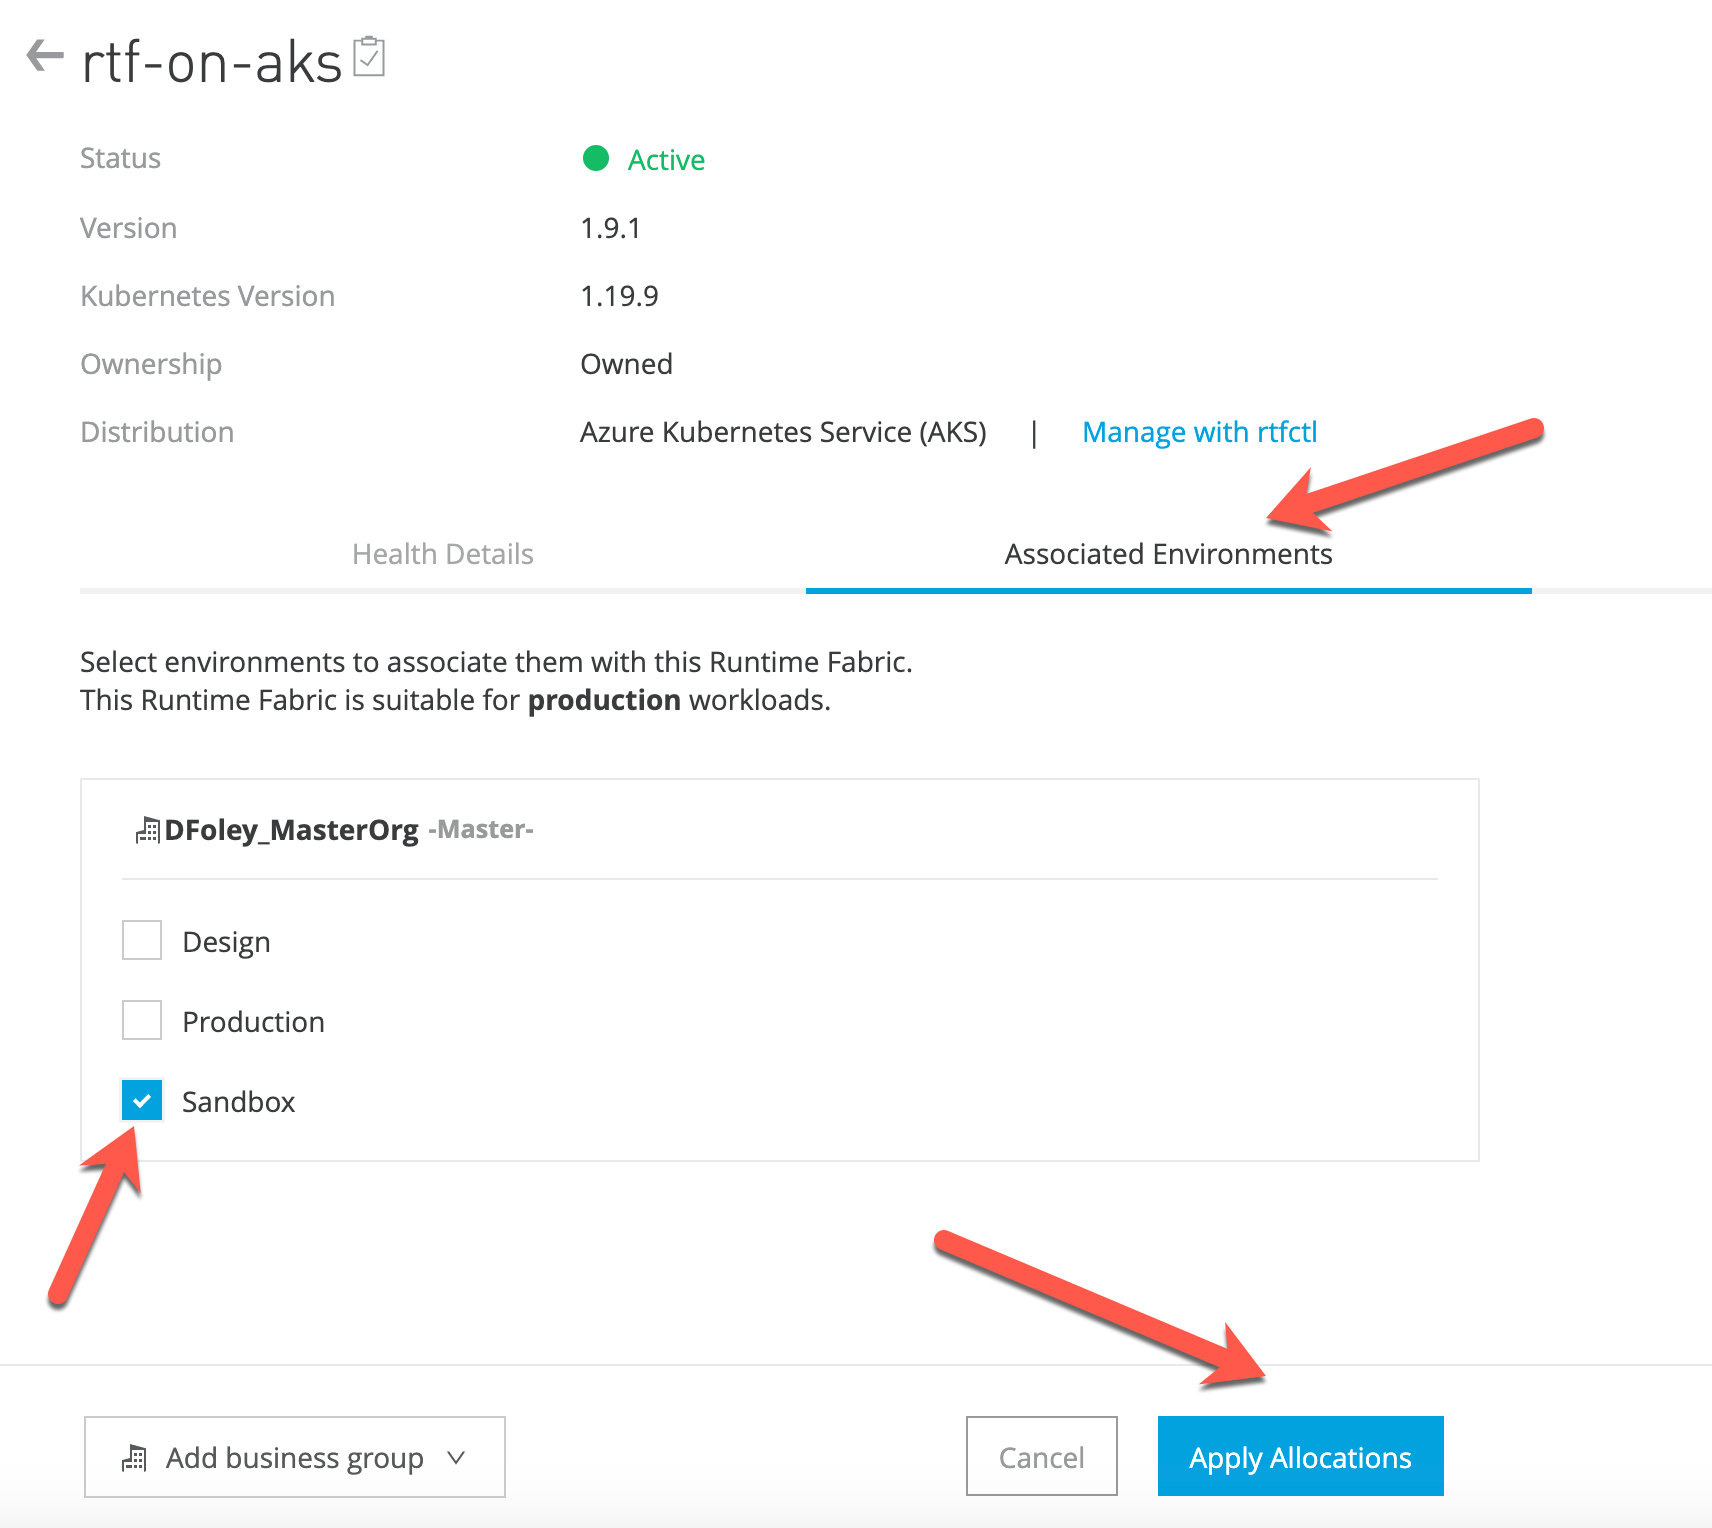
Switch back to Anypoint Platform. First, make sure the status is Green and everything is healthy.
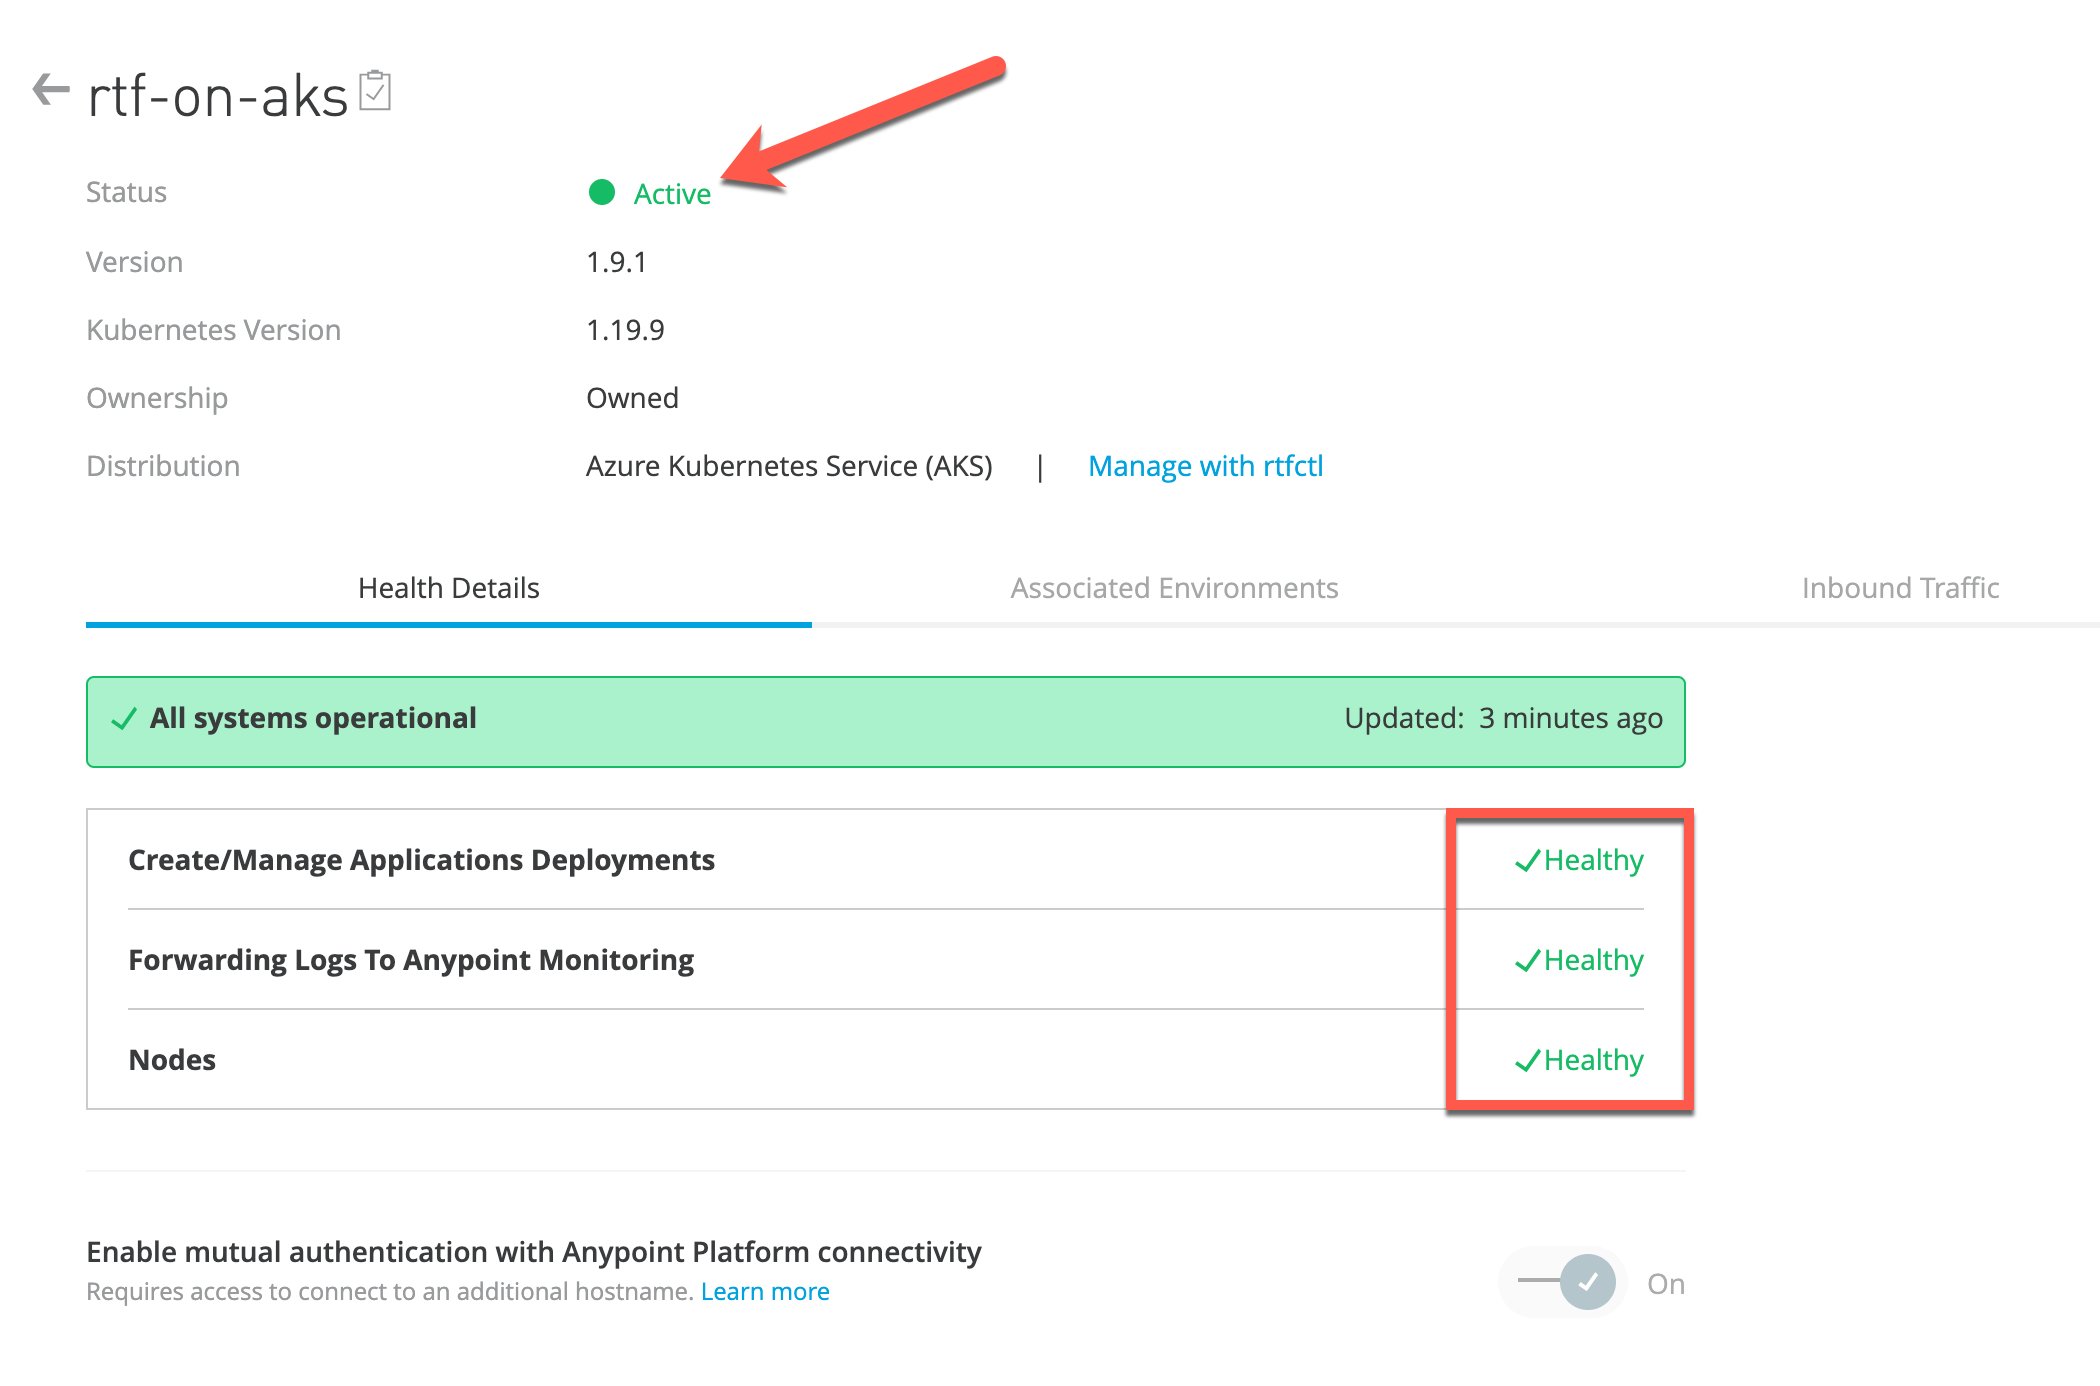
Next, click Associated Environments and select your environment. In our example we are selecting Sandbox. Click Apply Allocations.
Switch back to Cloud Shell. Now we need to update RTF with a valid MuleSoft license key. From the Cloud Shell click the file upload button and select Upload. Upload your MuleSoft provided license file. In our example, it is named license.lic. We will need to convert the MuleSoft provided license file to Base64 encoded. Use the following command:
base64 -w0 license.lic
Update RTF with the MuleSoft license key using the following command:
./rtfctl apply mule-license {BASE64_ENCODED_LICENSE}
To verify the MuleSoft license key has been applied correctly, run:
./rtfctl get mule-license
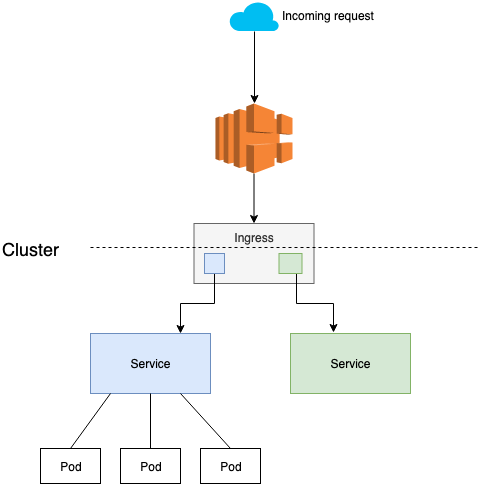
One of the most popular Ingress controllers being used is Nginx. However, customers might be using a different solutions. High level architecture diagram looks like this:
Run the following command will create all necessary resources for the ingress controller:
kubectl apply -f https://raw.githubusercontent.com/kubernetes/ingress-nginx/controller-v0.45.0/deploy/static/provider/cloud/deploy.yaml

Now run the below command to get the URL/IP address of your load balancer.
kubectl get services -n ingress-nginx

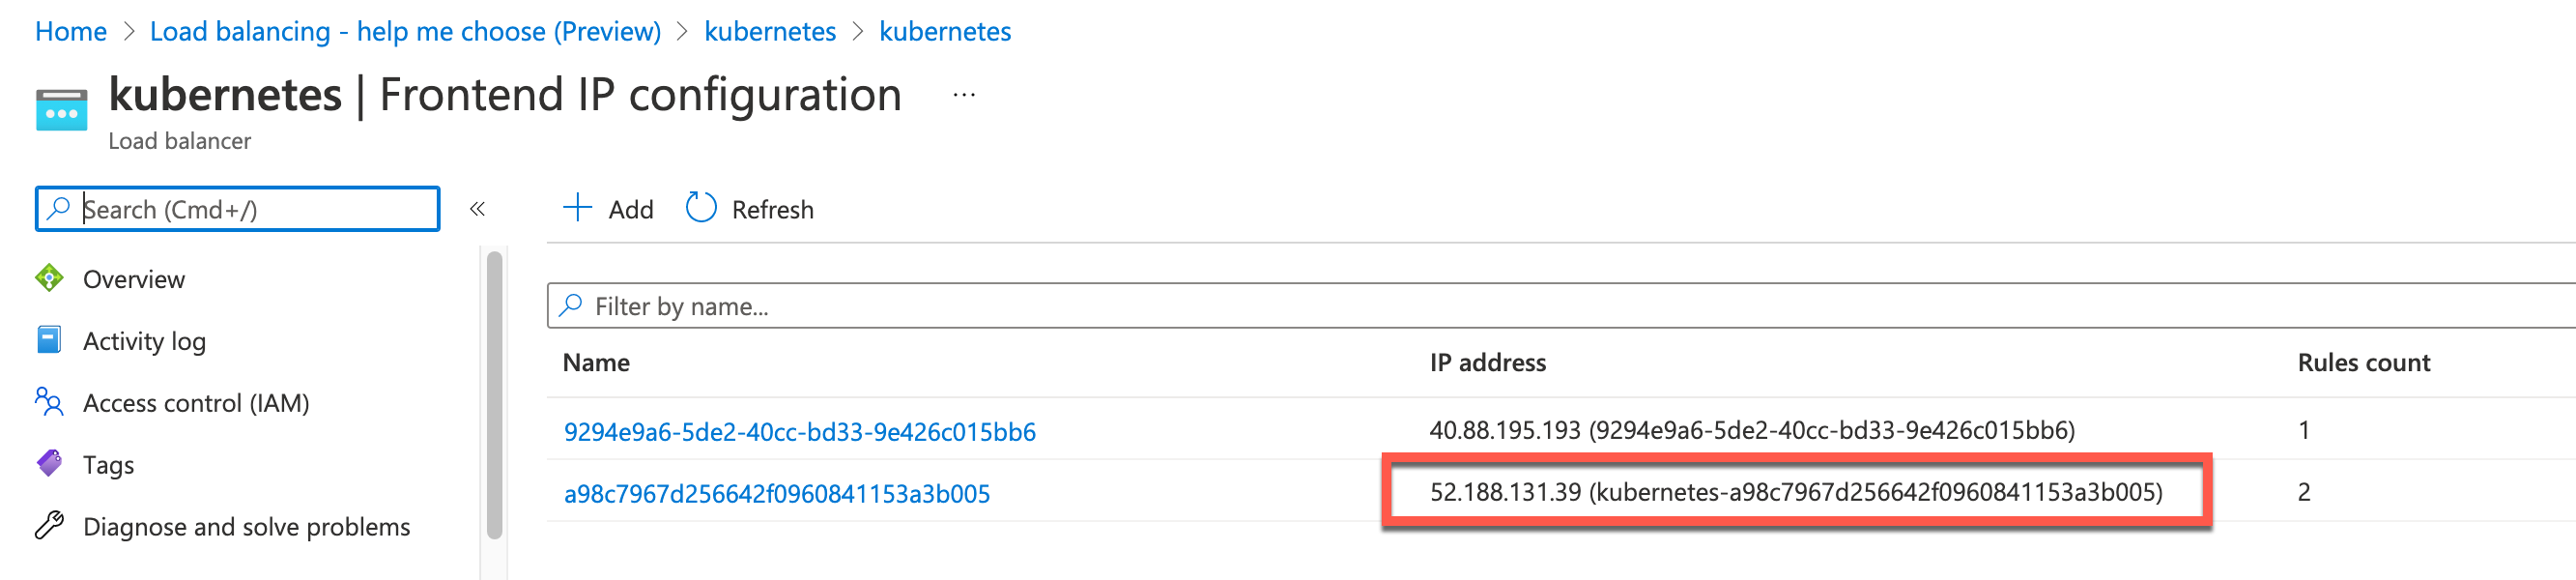
Once you have an external IP, switch over to Azure portal to view the created Azure Load balancer. In the Search bar enter Load balancers.
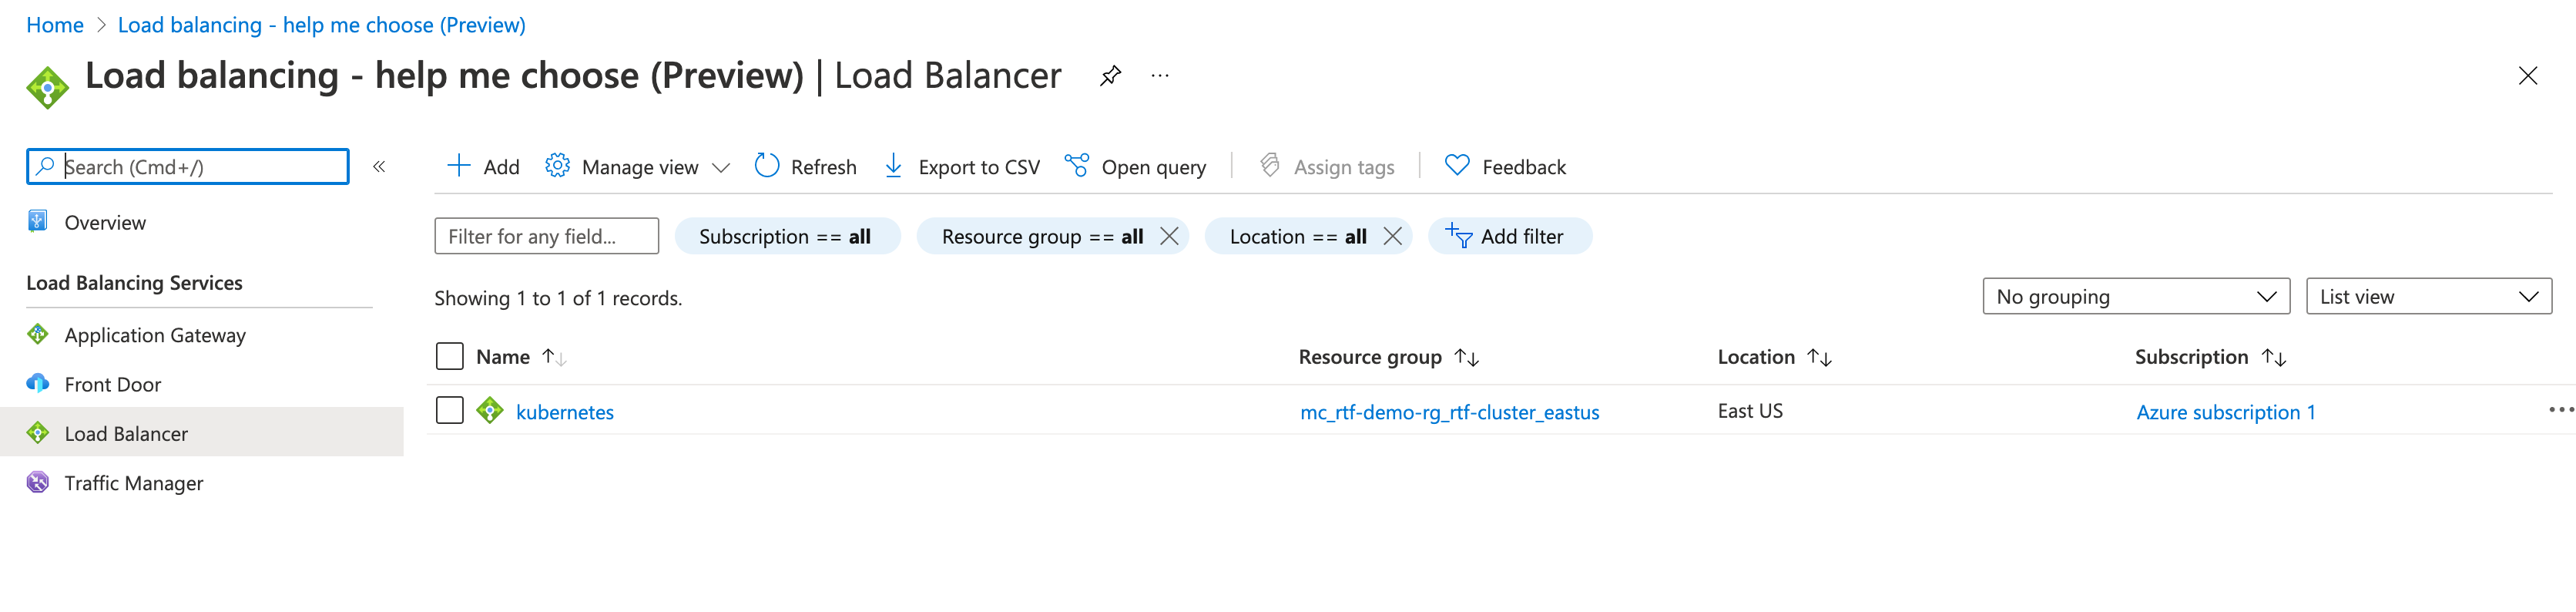
If you click on the auto generated name kubernetes you can view the details.
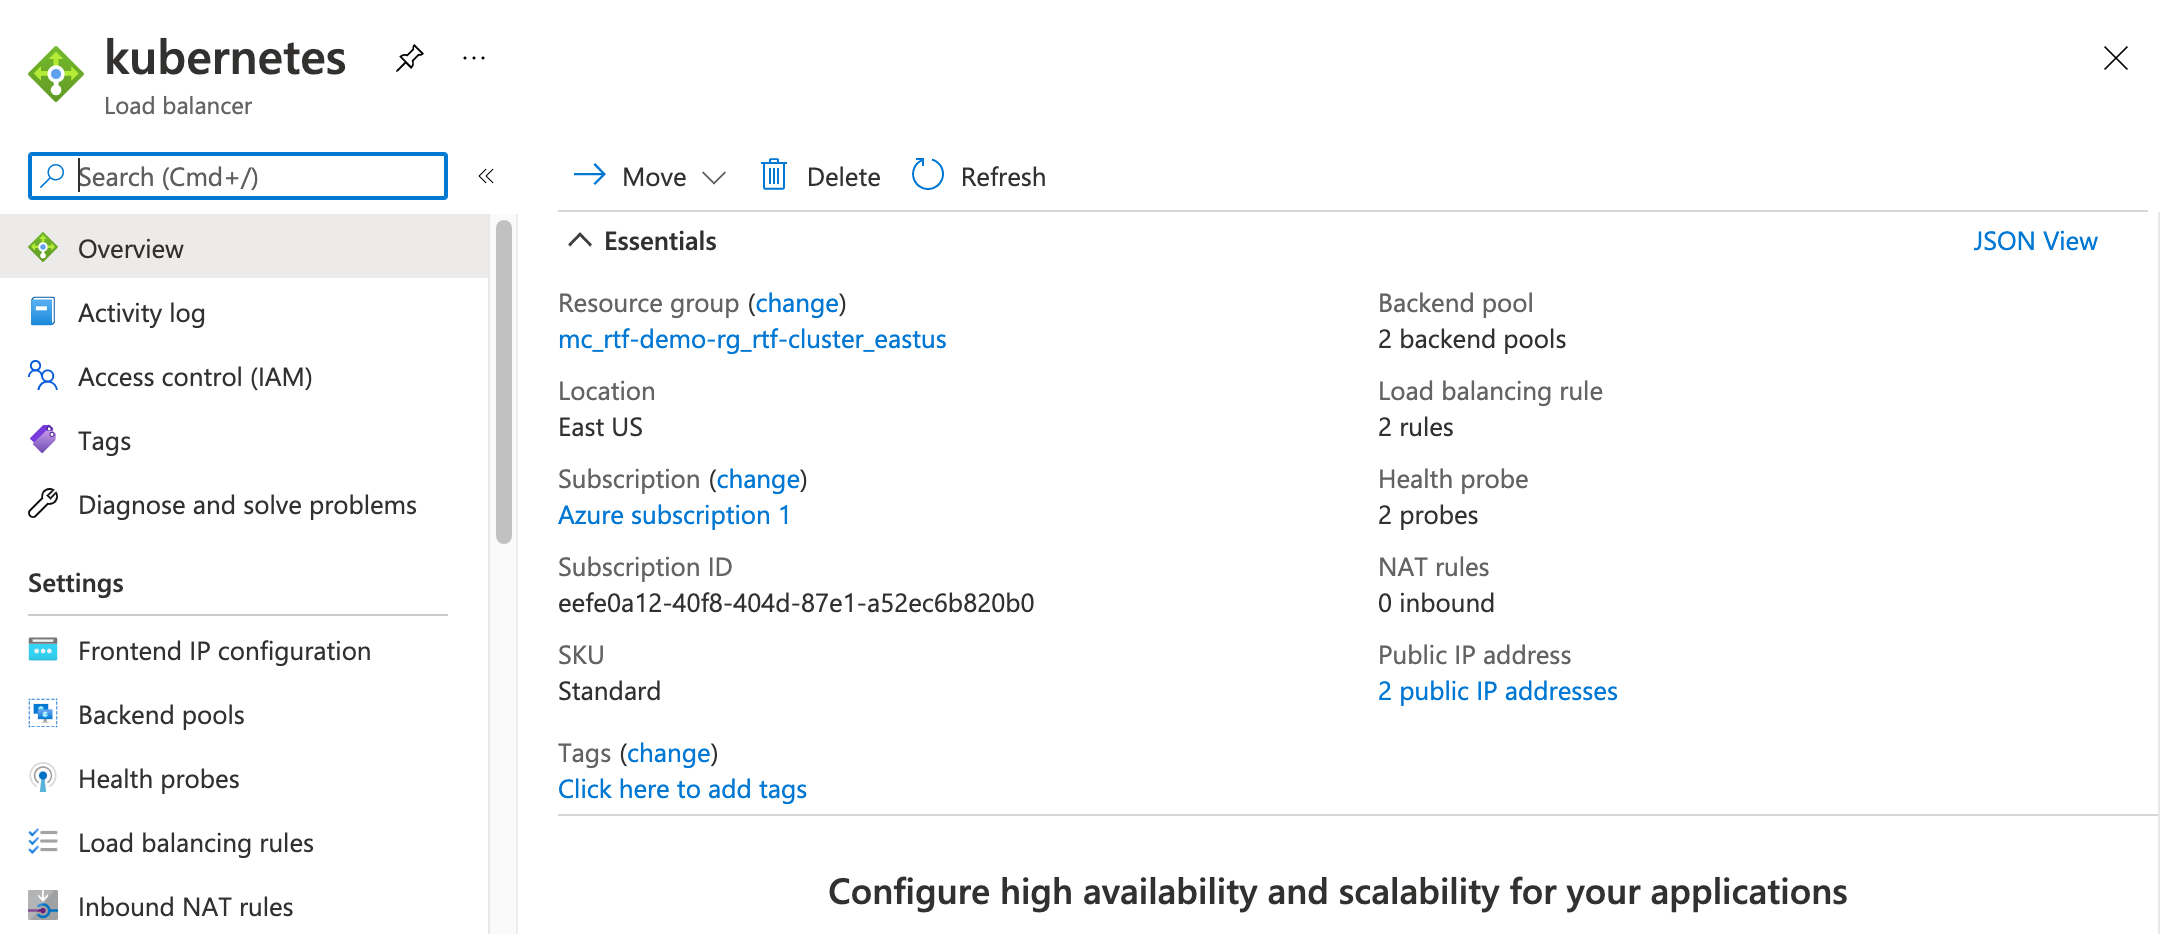
Click 2 public IP addresses to view the IP's.
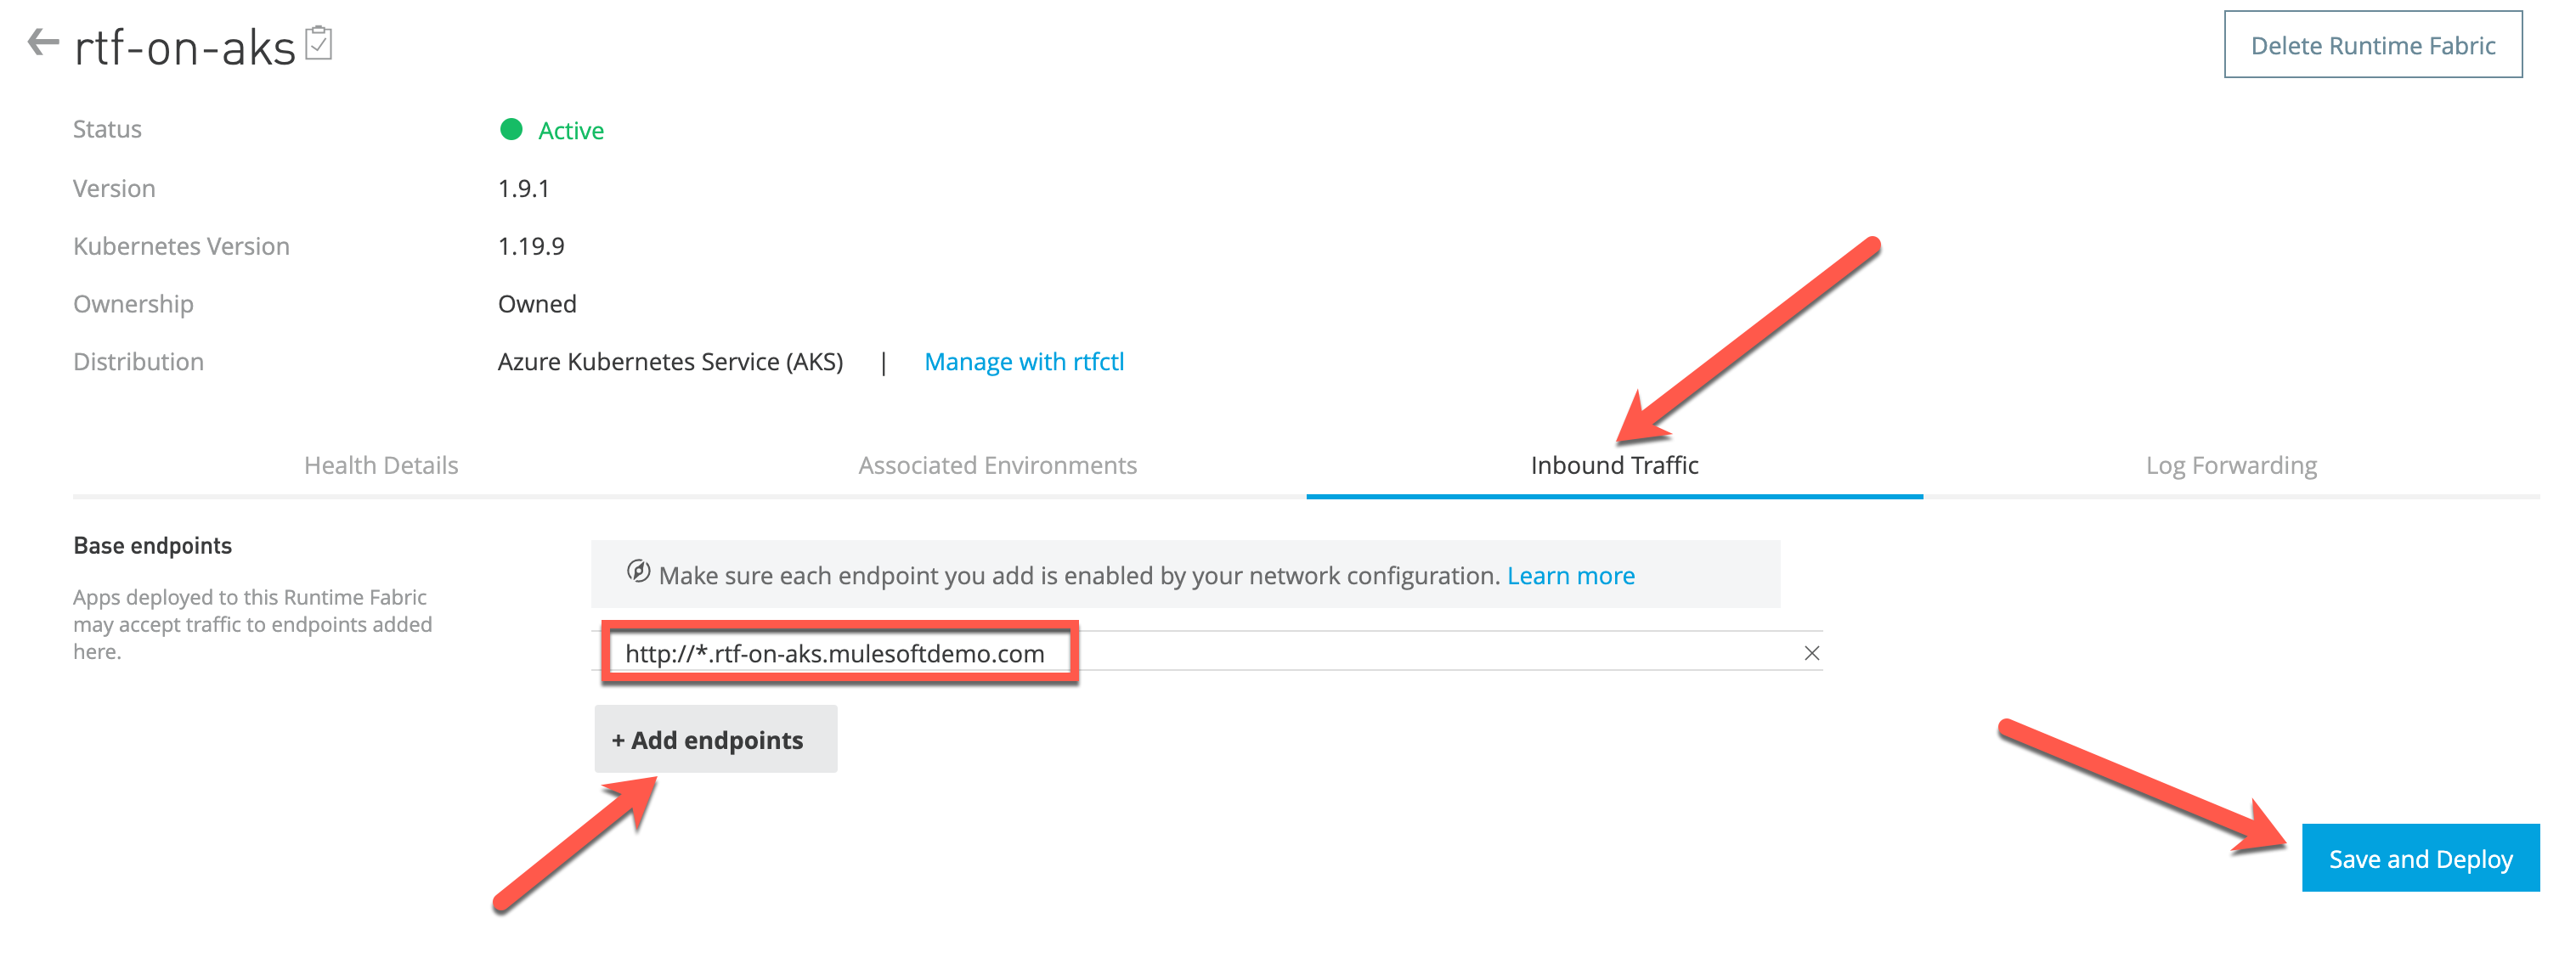
Switch back over to Anypoint Platform. Click Inbound Traffic. Update Runtime Fabric with a domain that you own or want your application/apis to use. Remember to include protocol while adding the domain(s). By default, application will accept all domains if no domain is defined. For our example we will be using rtf-on-aks.mulesoftdemo.com. Click +Add endpoints. Enter http://*.rtf-on-aks.mulesoftdemo.com and click Add Endpoints. Once you have your endpoints added click Save and Deploy.
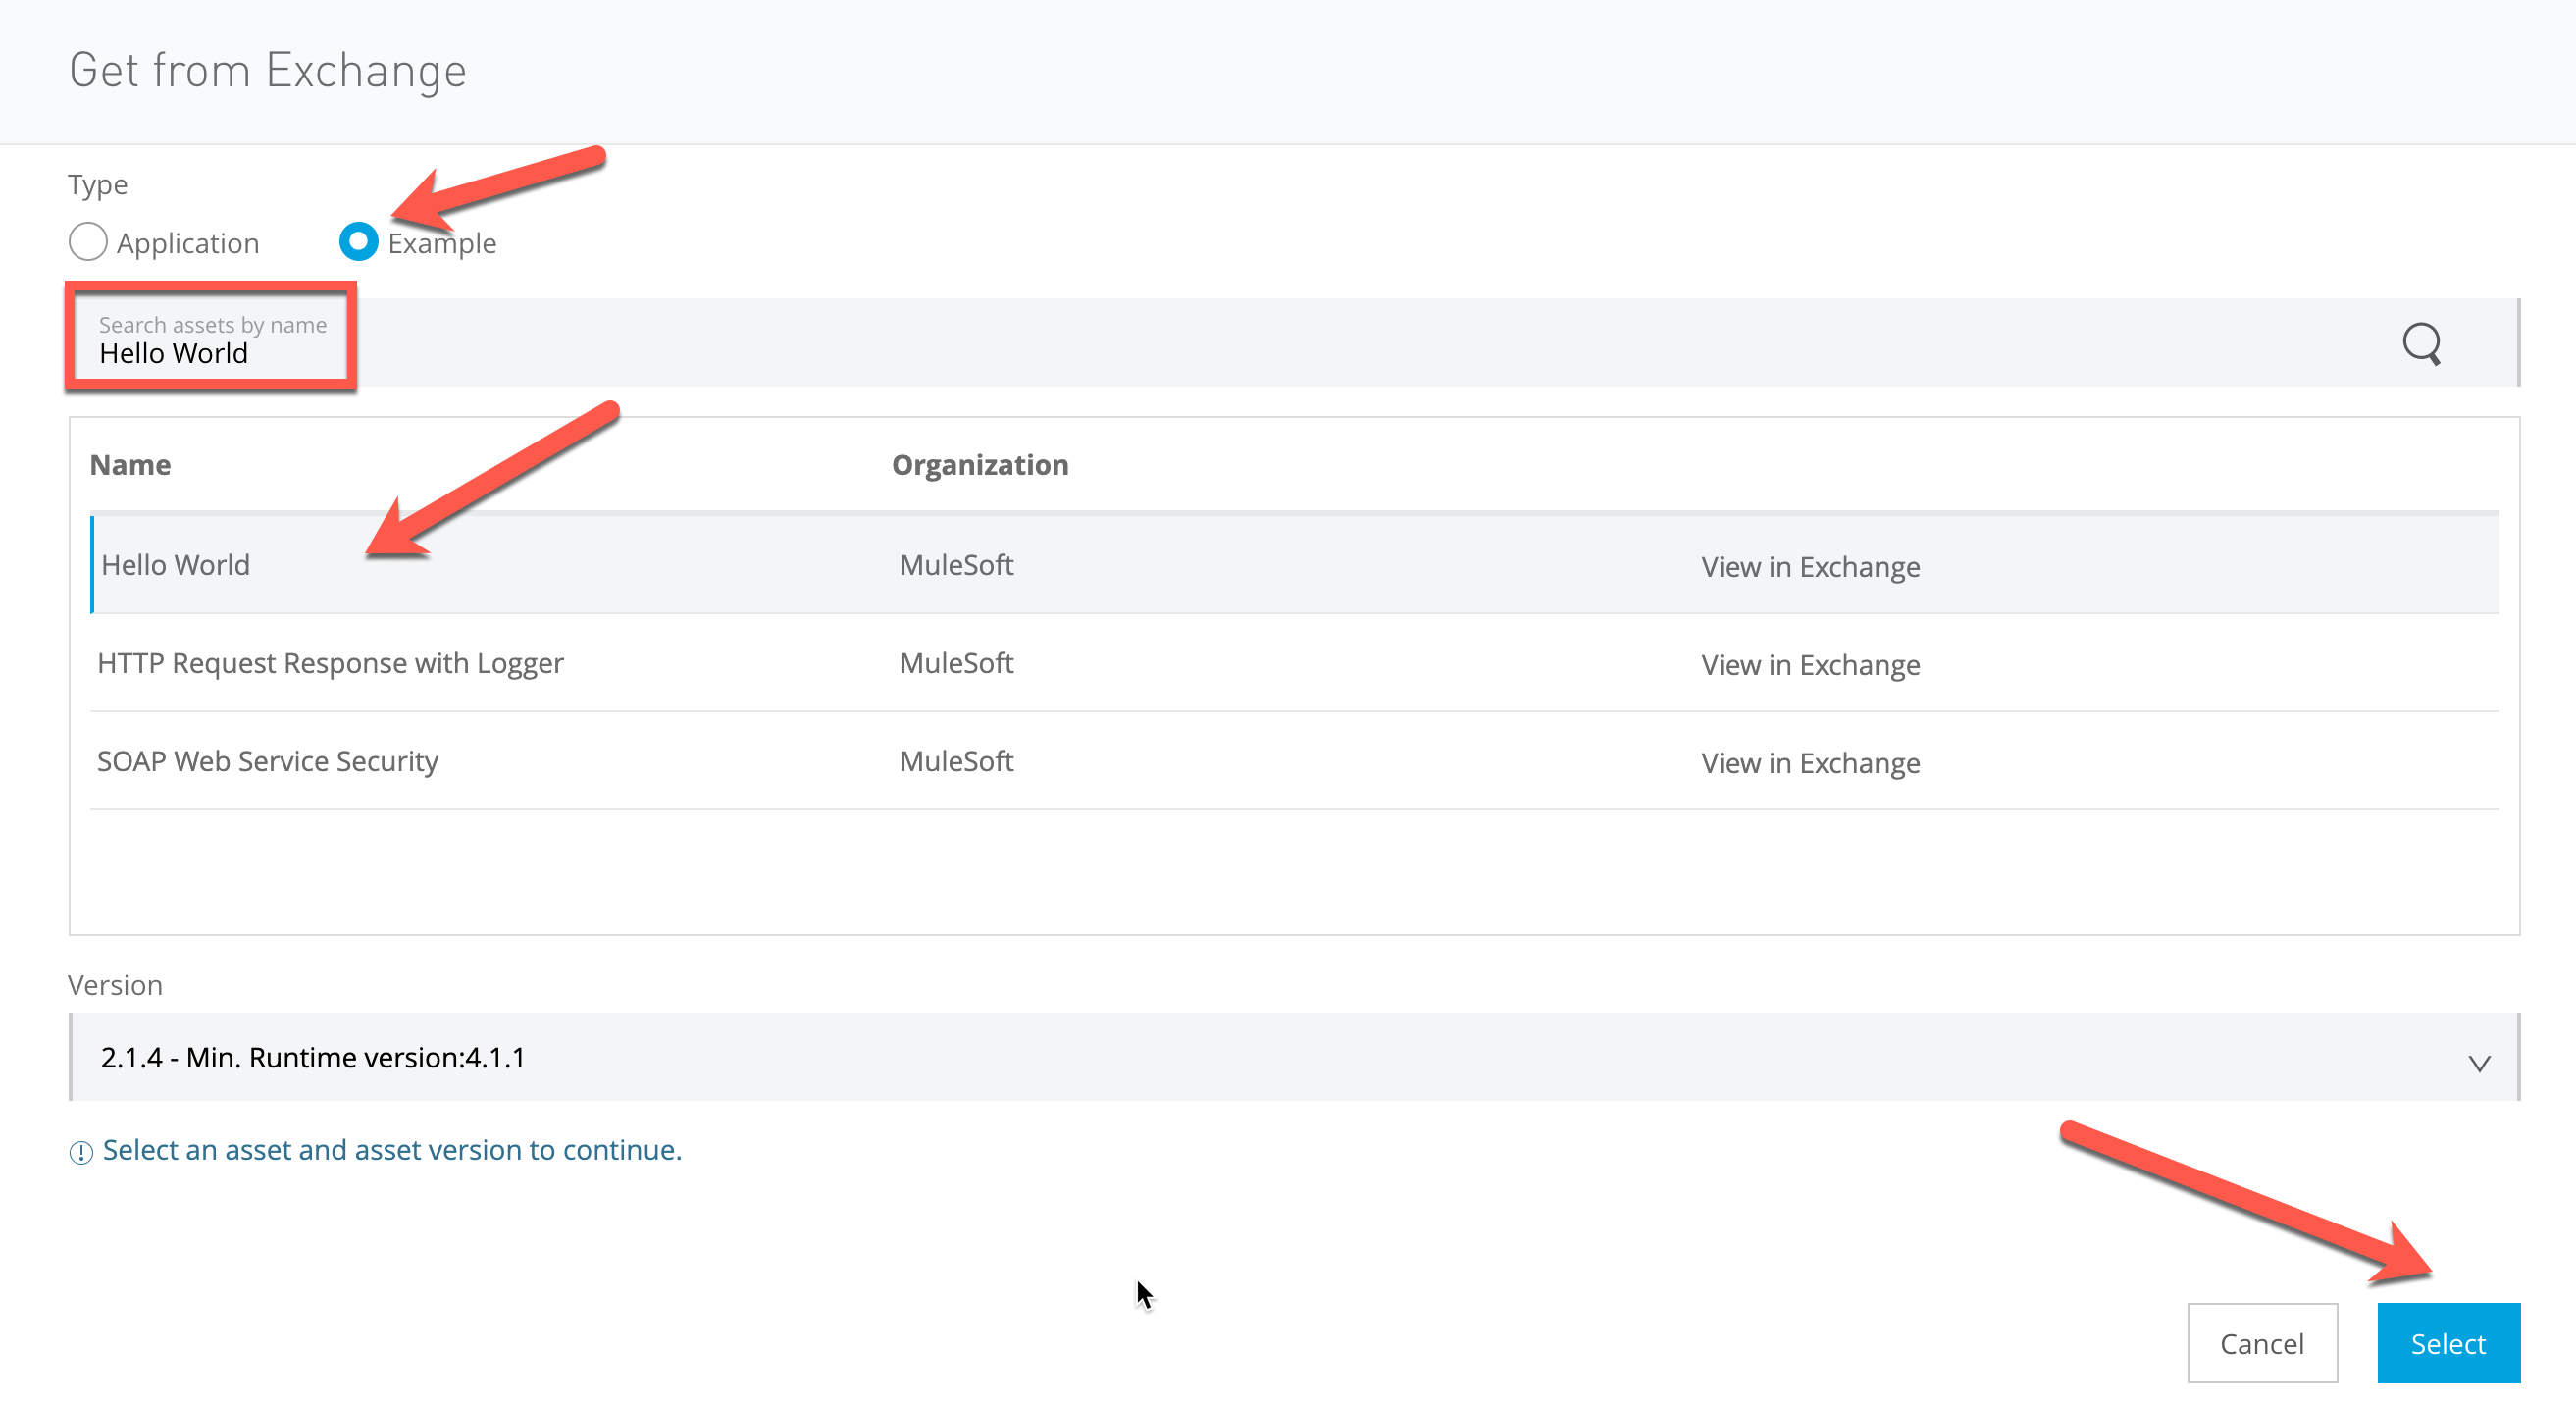
A hello word app is provided as an example for you the get started quickly. In Anypoint Platform click Applications on the Runtime Manager left-hand menu. Click Deploy Application. For the Application Name enter hello-world. Select rtf-on-aks from Deployment Target.

Click Example. In the search bar enter Hello World. Select the Hello World example and click select.
Keep all default settings and click Deploy Application. Once the status changes to Running click the application name hello-world. You should see the Application URL for you application that is running RTF.

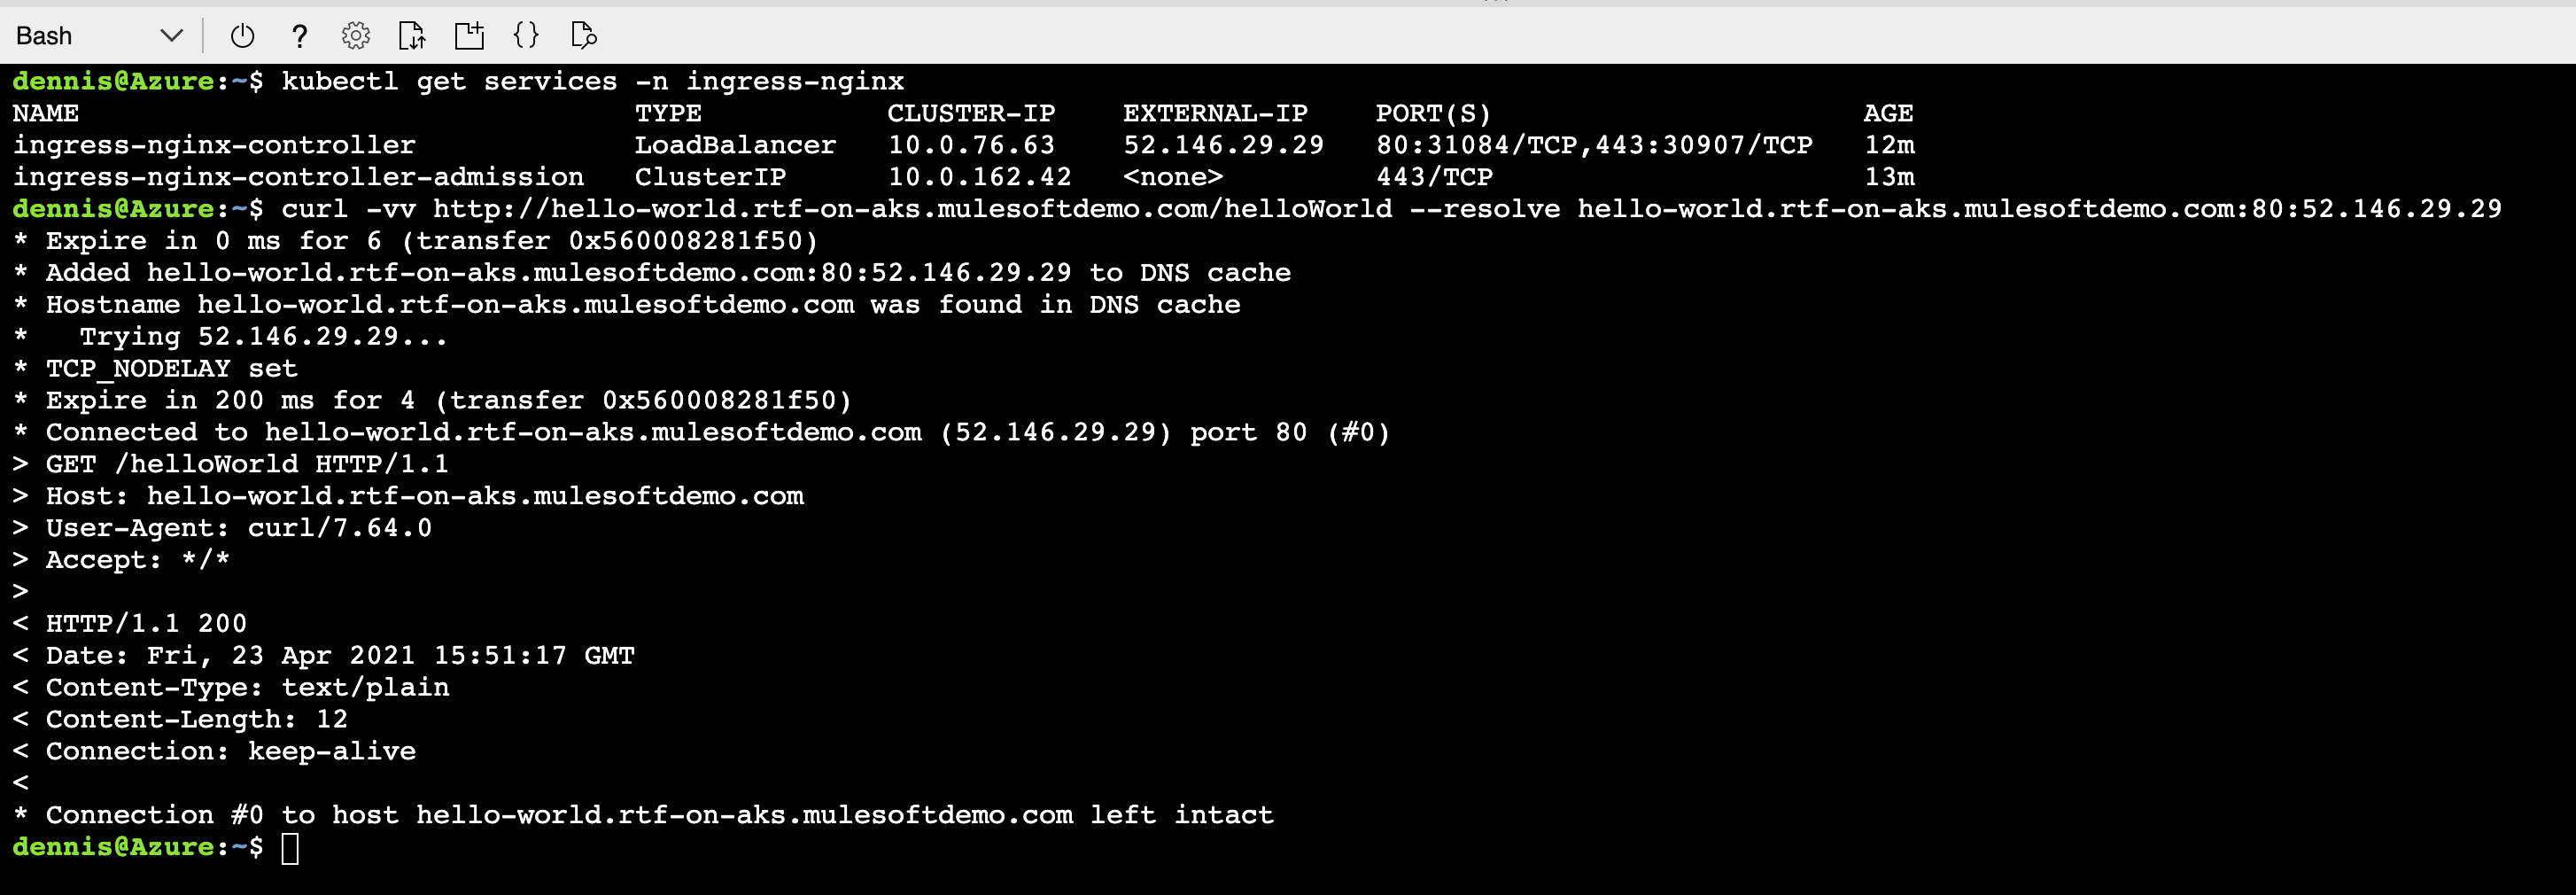
To access your application endpoint we need to either setup a domain address or use local host file. To keep things simple we will use the resolve flag so that we can pass the hostname IP mapping on the command line. Return to your Azure Cloud Shell. If you need to get your external IP to execute the following command:
kubectl get services -n ingress-nginx
Copy the EXTERNAL-IP for the ingress-nginx-controller service. Issue the following command to hit your application. If you see Hello World! returned congratulations!!! You have successfully installed RTF on AKS.
curl -vv http://hello-world.rtf-on-aks.mulesoftdemo.com/helloWorld --resolve hello-world.rtf-on-aks.mulesoftdemo.com:80:{IP address of ingress controller}